This loaf-like dessert with a long name of “Lemon Scented Pull Apart Coffee Cake” is my sister’s favorite. We always make it when she is in town. For some reason, it comes out twice as good with her involvement. I say, she has her own ways with this cake :P This particular dessert is soooo fluffy, so lemony (at time orangy) and with the cheese icing, it is hard to find a substitution for it! Irresistible!
We keep ourselves very busy during the day! When Kamola comes over for a week, I sure try to make the best of our time together. So, cooking and baking ends up occupying our late nights and way past midnights. As long as we both do not want to sleep, and have much to talk about, we are set to go! I CONFESS, we had much to talk about, but not much to cook! But we made sure we had our Lemon Scented Coffee Cake for late night chats :D
Just remember gals, things are good in moderation. NO EATING this cake in one session. Although it is very tempting.
It took me 4 tries before I perfected the alignments of this cake. While I love Flo Braker recipes, deep down inside, I wish the recipes came with step-by-step directions and photos. Well, we can fix that part :) Let’s get down to business!
Yield: Makes one 9-by-5-inch coffee cake, about 14 servings
Sweet Yeast Dough:
- About 2 3/4 cups (12 1/4 ounces) all-purpose flour
- 1/4 cup (1 3/4 ounces) granulated sugar
- 2 1/4 teaspoons (1 envelope) instant yeast
- 1/2 teaspoon salt
- 1/3 cup (2 1/2 fluid ounces) whole milk
- 2 ounces (1/2 stick/55 grams) unsalted butter
- 1/4 cup (2 fluid ounces) water
- 1 1/2 teaspoons pure vanilla extract
- 2 large eggs, at room temperature
Lemon Paste Filling:
- 1/2 cup (3 1/2 ounces/100 grams) granulated sugar
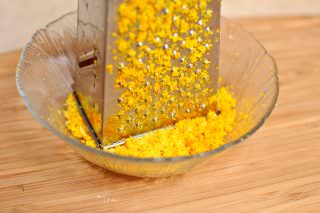
- 3 tablespoons finely grated lemon zest (3 lemons in the original recipe, I reduced it to 2)
- 1 tablespoon finely grated orange zest (a used a little more for this)
- 2 ounces (1/2 stick/55 grams) unsalted butter, melted
Tangy (pretty Tangy) Cream Cheese Icing:
- 3 ounces cream cheese, softened
- 1/3 cup (1 1/4 ounces) powdered sugar
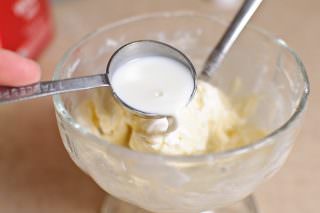
- 1 tablespoon whole milk
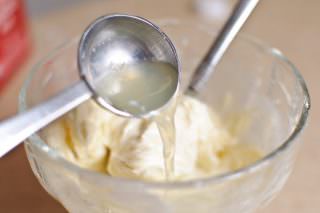
- 1 tablespoon fresh lemon juice
Directions for the sweet yeast dough:
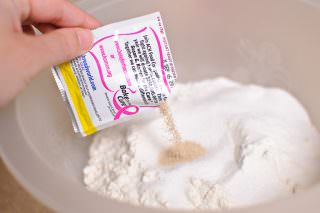
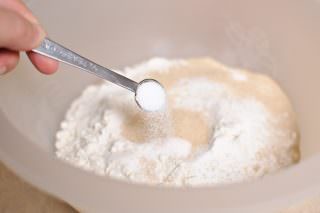
Stir together 2 cups (9 ounces) of the flour, the sugar, the yeast, and the salt in the bowl of a stand mixer; set aside. Original recipe calls for the standing mixer. I used my hand held mixer. You can use either one of them.
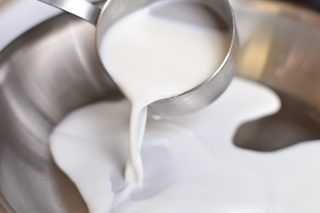
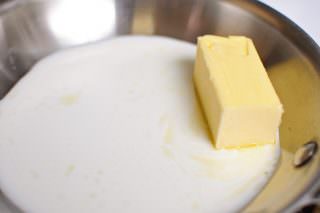
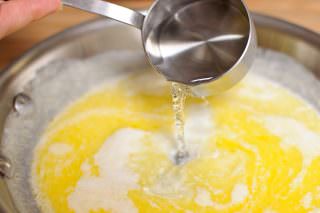
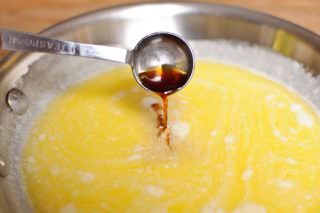
In a small saucepan, heat the milk and butter over low heat just until the butter is melted. Remove from the heat, add the water, and set aside until warm (120 to 130°F [49 to 54°C]), about 1 minute. Add the vanilla extract.
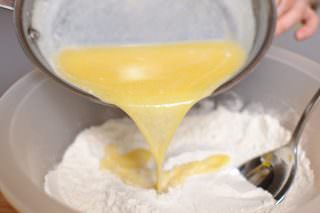
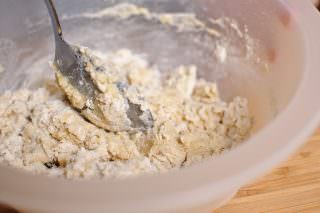
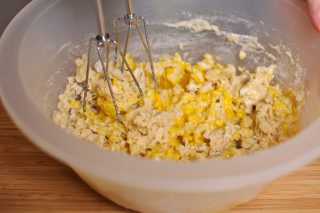
Pour the milk mixture over the flour-yeast mixture and, using a rubber spatula, mix until the dry ingredients are evenly moistened. Or you can use a simple spoon. Works quite well :) Attach the bowl to the mixer, and fit the mixer with the paddle attachment. With the mixer on low speed, add the eggs, one at a time, mixing after each addition just until incorporated. If you are using a hand-held mixer, follow the same procedure.
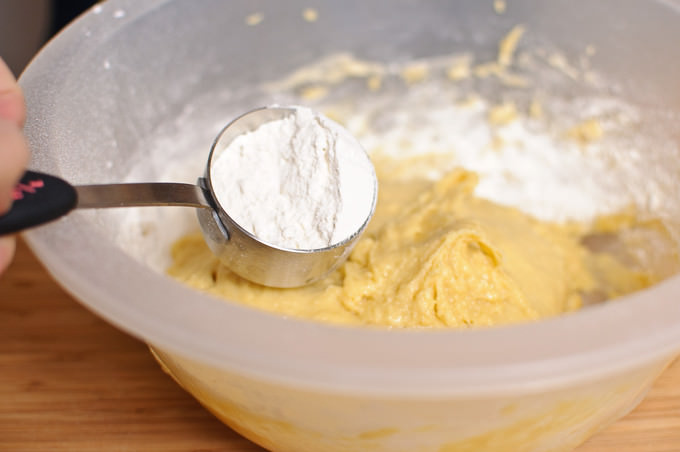
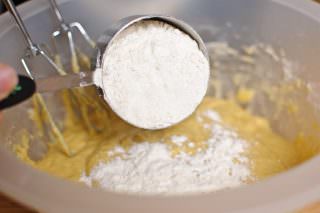
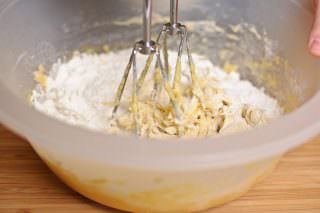
Stop the mixer, add 1/2 cup (2 1/4 ounces) of the remaining flour, and resume mixing on low speed until the dough is smooth, 30 to 45 seconds.
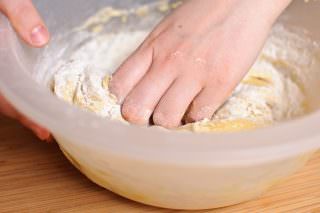
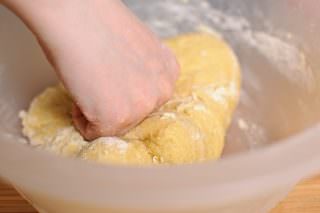
If you are using the standing mixer, add 2 more tablespoons flour and mix on medium speed until the dough is smooth, soft, and slightly sticky, about 45 seconds. If you are using a hand-held mixer add 2 more Tbsp flour and start gently kneading the dough by hand, right in the container you are using. Hand-held mixer will not do a such a good job during this process. The dough gets rolled in to the paddle attachments of the hand mixer. That was my mistake :D The dough should be nicely soft but not sticky to the touch. If it is add 1 more TBSP of flour.
For the standing mixer: Sprinkle a work surface with 1 tablespoon flour and center the dough on the flour. Knead gently until smooth and no longer sticky, about 1 minute, adding an additional 1 to 2 tablespoons flour only if necessary to lessen the stickiness.
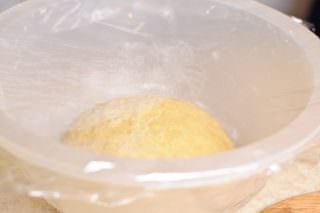
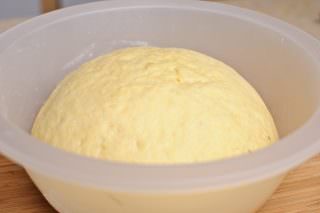
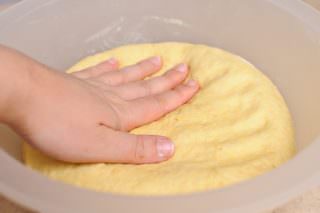
Place the dough in a large bowl, cover the bowl securely with plastic wrap, and let the dough rise in a warm place (about 70°F [21°C]) until doubled in size, 45 to 60 minutes. Press the dough gently with a fingertip. If the indentation remains, the dough is ready for the next step.
Lemon Paste Filling:
In a small bowl, mix together the sugar and the lemon and orange zests. Set the sandy-wet mixture nearby (the sugar draws out moisture from the zests to create the consistency).
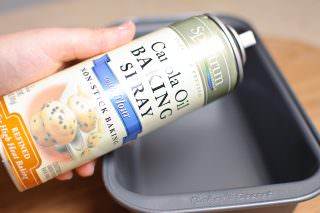
*Lightly butter a 9-by-5-by-3-inch loaf pan. Or, lightly coat the pan with nonstick spray. *Center a rack in the oven and preheat the oven to 350°F (175°C).
Making the Coffee Cake:
Gently deflate the dough.
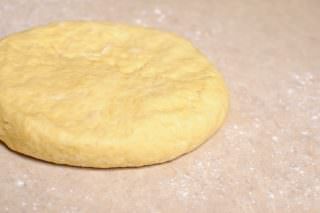
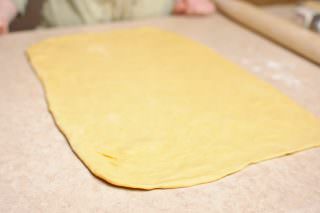
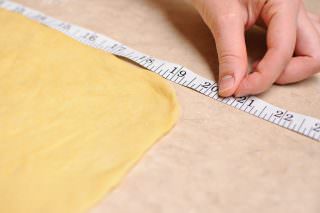
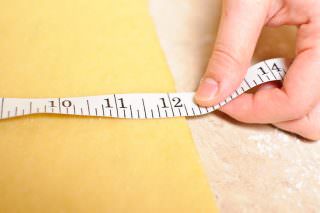
On a lightly floured work surface, roll out the dough into a 20-by-12-inch rectangle. The importance of rolling out the exact measurements will ensure you to have a perfectly shaped coffee cake. If you take the measurements slightly different, the shape of the coffee cake might come out different. That’s what happened in my experience. Oh well, even if the shape is not the exact rectangle needed, the taste is not going to suffer!!
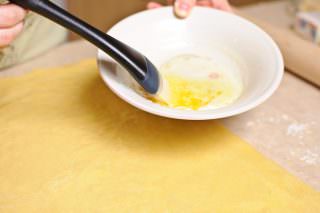
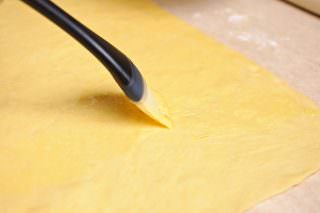
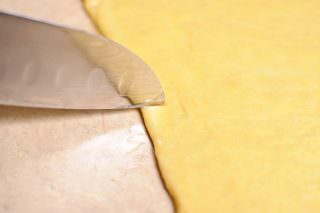
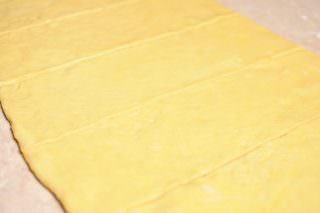
Using a pastry brush spread the melted butter generously over the dough. Let is “dry” tiny bit. Cut the dough crosswise into 5 strips, each about 12 by 4 inches. (A pizza cutter is helpful here but a sharp knife will do).
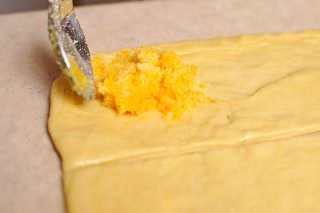
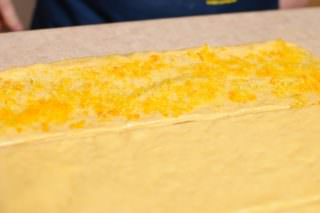
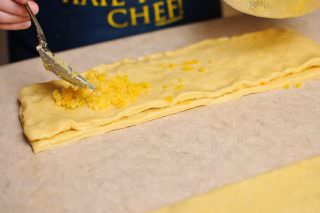
Sprinkle 1 1/2 tablespoons of the zest-sugar mixture over one of the buttered rectangles. Top with a second rectangle and sprinkle it with 1 1/2 tablespoons of the zest-sugar mixture. Repeat with the remaining dough rectangles and zest-sugar mixture, ending with a stack of 5 rectangles.
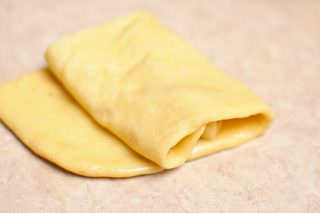
*Lifting the strips from the rolling surface might be a little hard. While pulling the shape of the strip will change. To avoid this problem I gently (without pressing) rolled the strips and unrolled them on top of the previously “lemon-zested” layer. Work carefully when adding the crumbly zest filling, or it will fall off when you have to lift the stacked pastry later.
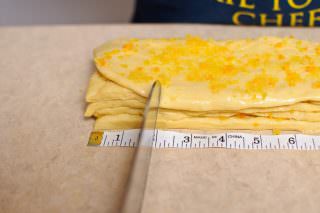
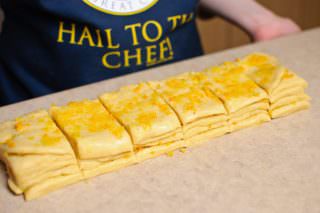
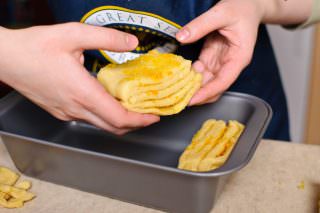
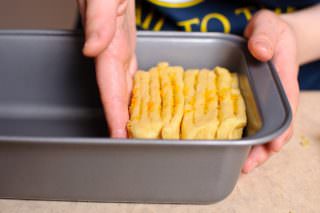
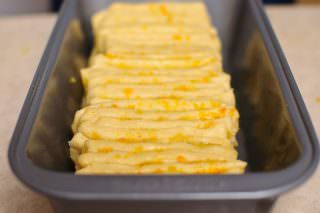
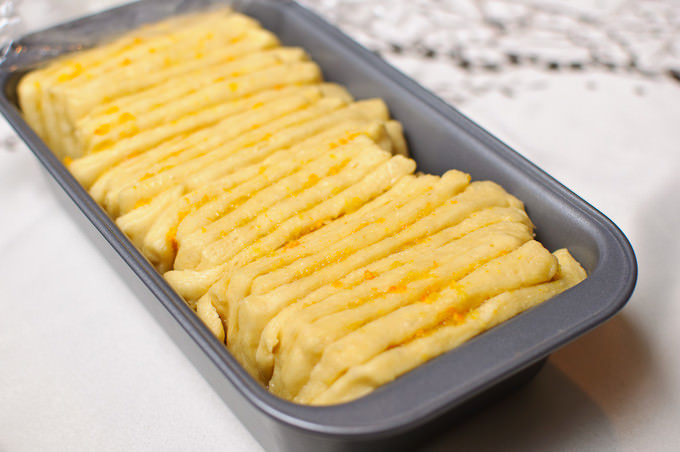
Slice the stack crosswise through the 5 layers to create 6 equal strips, each about 4 by 2 inches. Fit these layered strips into the prepared loaf pan, cut edges up and side by side, right in the center of the pan. (While there is plenty of space on either side of the 6 strips widthwise in the pan, fitting the strips lengthwise is tight. But that’s fine because the spaces between the dough and the sides of the pan fill in during baking). That lemon zest is making me drool as I type!!
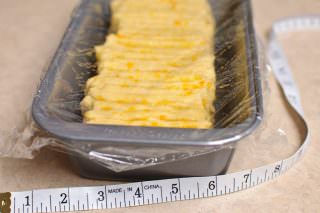
Loosely cover the pan with plastic wrap and let the dough rise in a warm place (70 °F [21°C]) until puffy and almost doubled in size, 30 to 50 minutes. Press the dough gently with a fingertip. If the indentation remains, the dough is ready for baking. Bake the coffee cake until the top is golden brown, 30 to 35 minutes.
Directions for cream cheese icing:
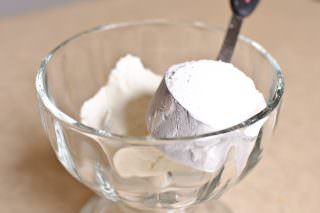
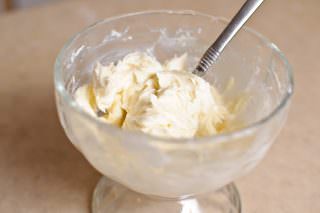
In a medium bowl, using a rubber spatula, vigorously mix the cream cheese and sugar until smooth. Beat in the milk and lemon juice until the mixture is creamy and smooth.
Decorating the Cake:
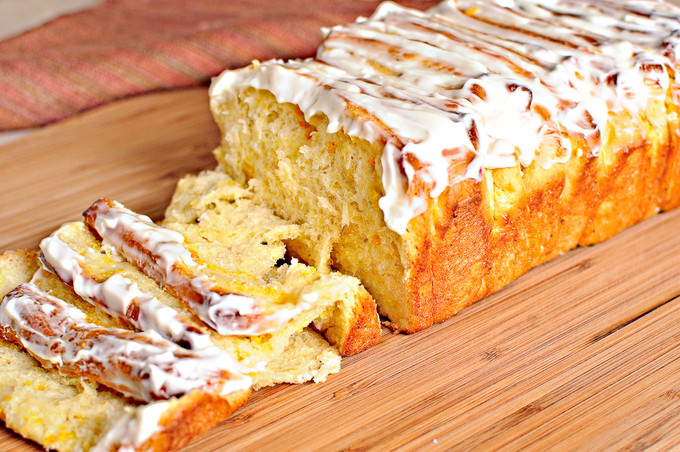
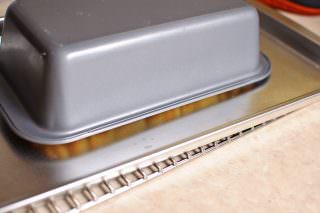
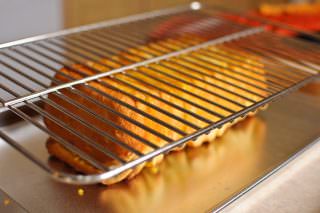
Once the Cake is done baking, transfer to a wire rack and let cool in the pan for 10 to 15 minutes. To remove the coffee cake from the pan, tilt and rotate the pan while gently tapping it on a counter to release the cake sides. Invert a wire rack on top of the coffee cake, invert the cake onto the rack, and carefully lift off the pan. Invert another rack on top, invert the cake so it is right side up, and remove the original rack.
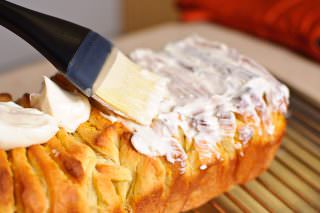
Using a pastry brush, coat the top of the warm cake with the icing to glaze it. (Cover and refrigerate the leftover icing for another use. It will keep for up to 2 days.)
Serve the coffee cake warm or at room temperature. To serve, you can pull apart the layers, or you can cut the cake into 1-inch-thick slices on a slight diagonal with a long, serrated knife. If you decide to cut the cake, don’t attempt to cut it until it is almost completely cool.
Bon Appetit! :)
P.S. you can click on the images for a larger view. Please leave your comments or questions in the comment section below and I will do my best to respond promptly.









Hilolahon judayam sizga havasim keladide,biram pazanda ayolsizde.Cake judayam zo’r chiqipti,aytingchi ichidagi nachinkasini har hil qilsa bo’ladimi?
Salom Sevara! Komplimentlar uchun rahmat :) Ichidagi nachinkasini boshqacha qilishni tavfsiya qilmagan bo’lardim. Propekat’sya qilmasligi mumkin, deb o’ylayman. Lemon yoq’maydimi? Apel’sin cedrasining o’zidan qilsangiz bo’ladi, lekin.
ما شاء الله لا قوة الا بالله
THIS IS AMAZING
Shukran Karima :)
This looks so good I can’t believe it!
Thank you very much, Miriam. I hope you enjoy it as much as we do :)
This should be called I have died and gone to heaven cake, that’s how good it looks.
Hahaha! I think that’s about where I want to be :P
Ajoyib retsept, mazasi rasmdan ham ko’rinib turibdi. Albatta tayyorlab korish kk. Cake dan ham koproq opa- singillarning late night chatlariga havasim keldi:)
Rahmat, Munirahon :)
Lola, YOU. ARE. AMAZING! This cake looks fantastic and unique. When I grow up, I want to be just like you hahahaha.
LooooL! Memoria, let’s take turns. I want to be you when I grow up, too :)
This looks amazing! I love lemon!
Thank you, Maria! Isn’t a nice twist to use up some lemons? :)
oh dear lord – this means i must workout double! must. make. this.
Oh, I do, I do!!! I work double when I am down with this cake :) I tell ya, WORTH IT :P Satisfying our cravings are equally important as working out. Otherwise we are going to be one unhappy cooks, lol.
Thank you for visiting my blog!!!!
Love,
Lola
Wow, that’s cool! I love the layering technique. I have a recipe for a banana choc chip bread and the layering is such a pain, folding and rolling and just a mess. I think this method looks so much easier. And I love lemon, so I’ll have to try your recipe and then try the layering with the banana bread…
Thank you Tovie! :) I love the layering technique, too. I am sure it will work out with the banana choc ship bread, too.
Wow this looks fantastic, sounds fantastic and thank you for the STEP by STEP photo’s.. this is one of those recipes that definitely NEEDS that…. great job.. new to your blog! Thanks for sharing.. this is going on the list….hmmm maybe for Easter morning breakfast? YUM!
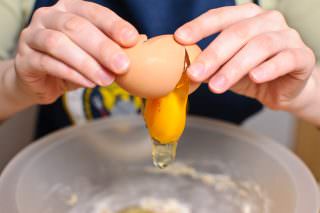
Just look at the picture of the cracking egg! That is really capture-the-moment photo! : )) We indeed had a lot of fun!
Oh, yes, yes! Thank you for cracking the eggs and helping with the Cake darling :D
Found you on foodgawker–this looks amazing! Do you think you could do the final rise overnight in the fridge so that it would be ready to bake in the morning?
I am sure it is possible. I am not sure if it is going to rise in the cold though. Leave the final rise in the fridge with the plastic wrap cover. Take it out in the morning, in advance. Let it warm up and rise until desired volume is reached. It will probably take about 30-45 min. If it actually rises in the fridge, still give it about 20 minutes to “warm up” to have a fluffy cake :)
Let me know how it turns out :) Thank you, Jessie
Thank you for the thorough step-by-step photos, they are extremely helpful for a recipe like this one. Your cake and your photos are beautiful.
Thank you Margot!!! :)
Yours turned out beautiful, masha Allah. I made this over the weekend and loved it (I just posted it on my blog today). I have included some step-by-step pictures too but yours are much better :o)
Hi Hanaa! I checked our your debut of the recipe and it turned out very, very well. I loved the light in your photos and your easy step-by-step recipe. Thank you for sharing it with me :)
Dear Lola.
First time to your wonderful site !!
landed here while searching some readings on DSLR…Wonderfully written on DSLRs…Very useful for photography beginners like me..
Awesome collection of recipes…Loved the Indian Gulab Jamuns too…
Plz do visit my blog at ur leisure….
regards
deepti
Hi Deepti,
I will most certainly visit your blog! I want to express our gratitude for your kind words about our blog and our tutorials. Thank you for being so supportive :)
This looks so delicious! I’m a little bit afraid to make it but I’m going to give it a shot. I love, love lemon and I want to make something impressive for my husband to bring to work. Thank you for the wonderful photos and step by step instructions.
Make it Jennifer! :) The only thing which might go wrong is the shaping process. Even if the shape is not going to be even, the taste of this cake will take care of everything! :D
I can’t stop staring at the pictures…job WELL DONE!!! I am drooling just thinking about eating this!
Oh, thank you Julia! It is so flattering to hear such compliments. I am really honored to be on the receiving end of the compliments :D
Hammasi yahshiyu shu ounce mouncelarni convert qilishga qiynalib kettim, anchadan beri qilaman degandim, hozir boshlayman, rezultatni keyin aytaman.
Husnorushka, hafa bo’misiz endi :) shu amerikaneclarning unciyalariyam yashasin! :) O’rganib ketdim lekin
Lola: I currently live in Tashkent, and came to your site via a Google search for Plov recipes, (since I like eating Plov so much), then stayed to browse through the rest of your lovely website. You have this recipe tagged as American food, but I was wondering if there is a local (Uzbek) substitute for cream cheese. I’ve never seen it at Korzinka. Compliments to your sister for the recipe. Thanks
Jim
I just made it, and it was DDDDD-licious!!! thank you sooo much for your wonderful recipes
i’m 24 weeks pregnant, and i was craving for this dessert from the moment i saw it. a month later i finally decided to make it( i waited for so long because i’m kinda new at baking), but it turned out perfect! my guests and the baby :) loved it! thank you very much for this recipe. moving on to the next one.. ;)
Fabulous recipe photo tutorial!
I made it. Delicious!!