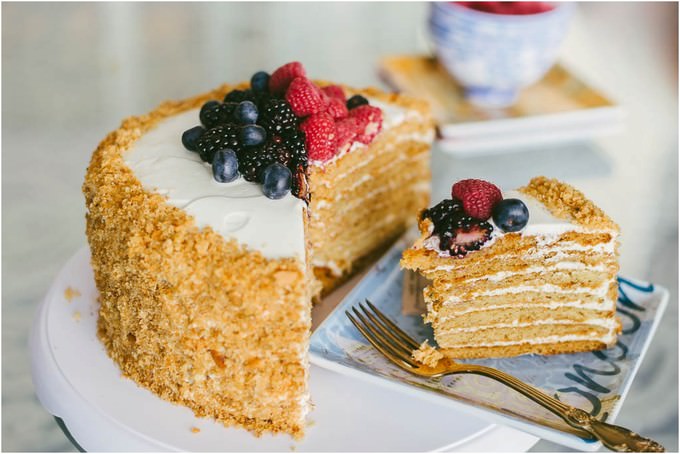
A gentle hint of graham crackers, but super moist, and airy. Perfectly balanced with a taste of caramel and a hint of sour cream; that’s what honey cake recipe is about! I’ve been making this cake from this recipe for a long time. It came to me through my mother-in-law who has been baking it for the past 40 years give or take.
There are many variations for the recipe of the honey cake. I used to make one called Vinni The Pooh, too. I mean, it does look like Vinny, doesn’t it? ha-ha! It was delicious! Maybe we will get to it one day. But today I want to share this particular recipe with you. What I love the most about today’s recipe, is that the layers of the cake do not get baked into a hard disc. They stay airy and somewhat soft in order to soak up the right amount of frosting to become a slice of heaven in your mouth. However, spreading the sticky-ish dough will be a little bit of a challenge at first. However, with my tips, I promise you will get it right from the get-go! My recipes will give you as many details as possible. This particular recipe is riddled with photos to guide you through the process. Don’t get overwhelmed though. The recipe itself is very simple.
The biggest thing I will encourage you to do is to invest into a measuring scale. It is essential for a cook to have one in her arsenal. You never know when it will become useful. If you are baking a cake or making a dessert I would definitely rely on a scale more than I would rely on anything in the kitchen. With precise measurements for baking, the scale will guarantee that there will be very little room for an error. I’ve been using mine for the past 8 years and it is still going strong.
TIP OF THE DAY:
Before you turn on the scale, place a dish which you would like to measure things in on the scale. Once you put the dish on the scale, turn the scale on and press either a gram or an ounce as a measuring medium. If the recipe calls for grams f.e. the scale should show 0g with the dish on top of the scale. Place the ingredient which needs to be weighed in the dish and the scale will give you the true weight of the ingredient. This way you will not have to subtract the value of the dish that’s holding the ingredient every time you weigh something.
Ingredients for the dough:
- 3 large eggs
- 100gr granulated sugar
- 150gr honey
- 113 gr unsalted butter
- 1-1/2 Tsp baking soda
- 1 – 1/2 Tsp lemon juice or vinegar
- 350 gr all purpose flour + a little extra
- 50 gr chopped walnuts, for decoration (optional)
Ingredients for the frosting:
- 500gr sour cream
- 200gr heavy whipping cream
- 150gr sugar
- 1 tsp vanilla sugar or 1/2 tsp vanilla extract
Directions:
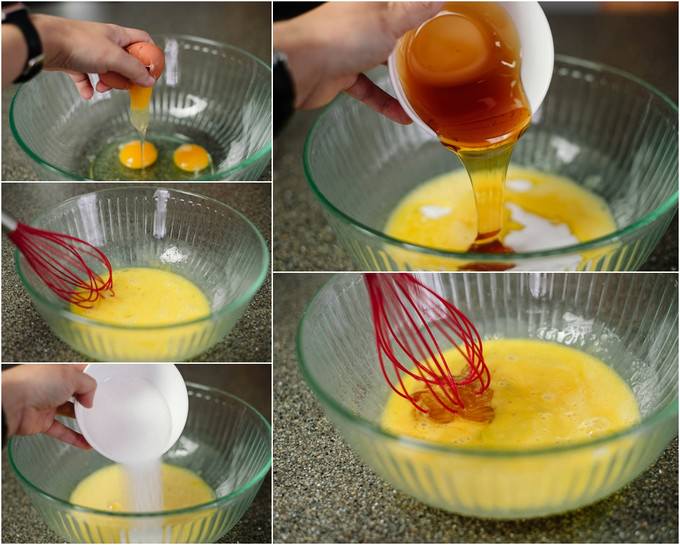
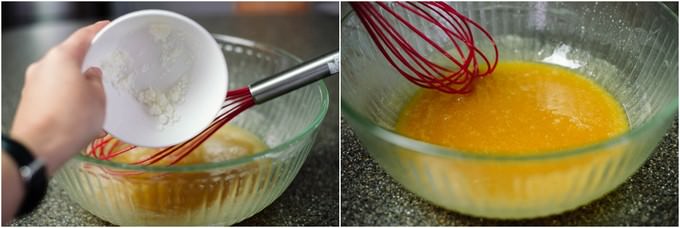
Have a large pot, suitable to hold a medium size bowl as a water bath (also known as bain-marie method). Have a little water boiling in this large pot while you are mixing initial ingredients of the dough. In a medium bowl crack the eggs, agitate them a little with a whisk, add sugar and honey. Mix everything well with a whisk.
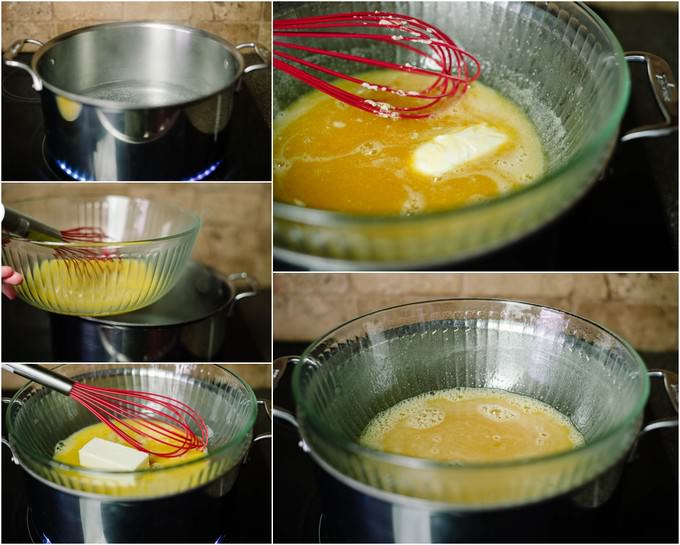
Transfer the honey mixture on top of the pot with boiling water (for the water bath, as shown in the photos). Turn the heat down to medium (no need to make an omelet out of the eggs), add butter into the honey bowl and continuously whisk the mixture until the butter is completely incorporated. This method will also melt the sugars and renders the batter base very pliable and quite workable. Once the butter has completely incorporated into the rest of the mixture. Turn the heat down and keep the batter on the water bath until you mix the baking soda with the lemon juice.
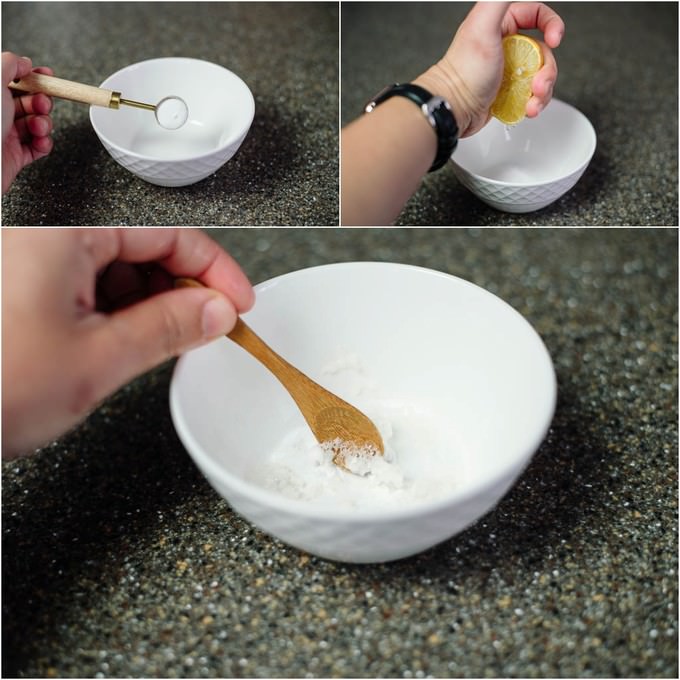
Do this very quickly. In a small cup mix baking soda with either lemon juice OR vinegar.
NOTE: This method is called “proofing”. It is done for two reasons: 1. activating the baking soda, so that the batter rises well and remains softer in the oven 2. to remove the aftertaste of baking soda (neutralizing) when used in larger quantities.
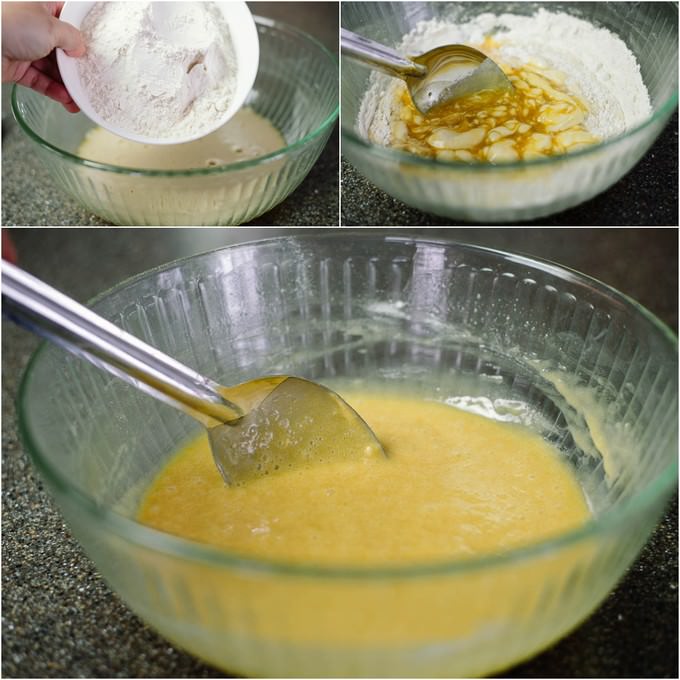
Remove the batter from the water bath and quickly work in the baking soda mixture into the batter. The batter will turn a little whitish during this process.
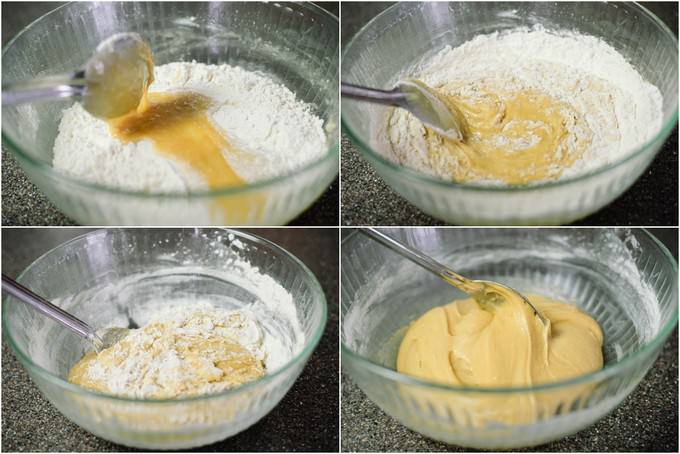
Add half of the flour into the batter and mix it in with a spoon. You don’t really need a whisk anymore. The flour will incorporate fairly well, without clumping.
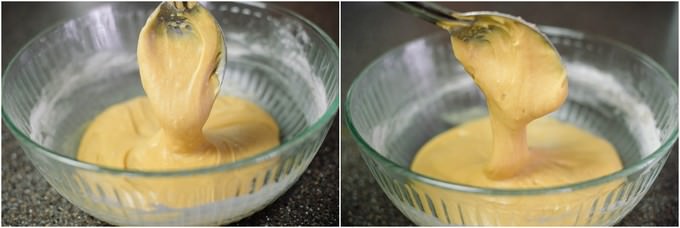
Add the second half of the flour and gently incorporate it. This time it will take a little more effort since the dough is going to start thickening. Within 1 minute you will have a dough the consistency of which should remind you of a thick pancake batter (maybe even a little thicker).
Do not attempt to handle the batter with your hands. It is quite sticky :) Set the batter aside to prep the baking dishes.
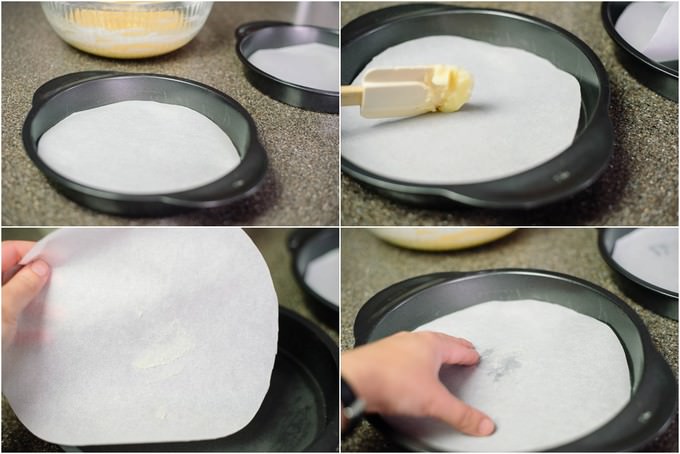
I use two 9-inch baking pans to bake the round layers of honey cake. Using two pans helps expedite the process of baking the layers. Cut out discs from the parchment paper to go on the bottom of 9-inch pans (just trace the bottom out). This way the batter will not stick to the bottom of the pans and you can easily re-use the same parchment paper for the entire batter. If you wish, grease one side of the parchment paper with a tiny bit of oil and place the paper with the butter side down. This will help the parchment paper from moving.
Turn the oven on to 390F.
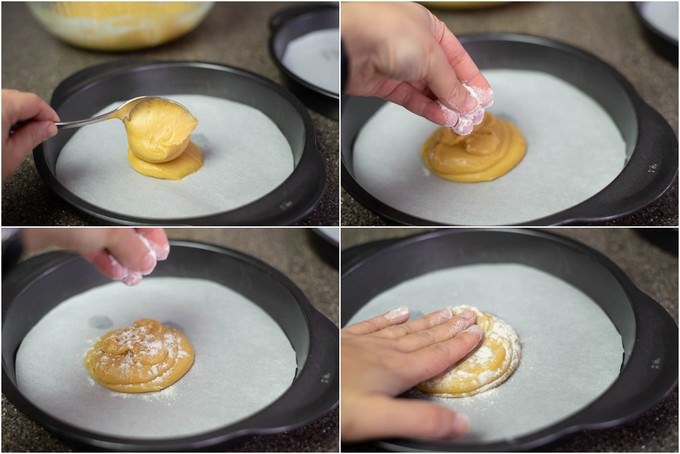
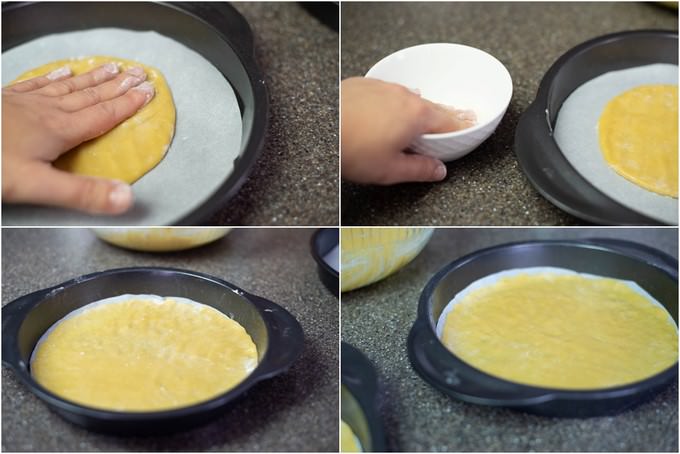
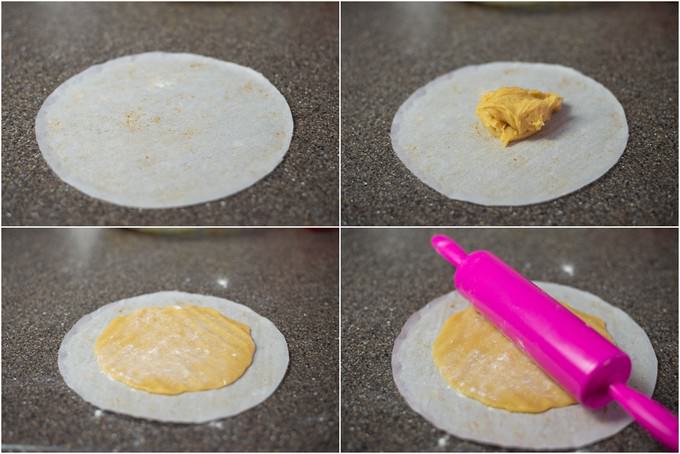
Grab a tablespoon and place 2 heaping tablespoons of the batter right in the middle of the parchment paper. You will need to have an additional teaspoon handy to help you scrape the batter off of a tablespoon on to the parchment surface. Sprinkle a little flour on top of the batter to help you spread it. Don’t be scared of this step. Your hands will remain almost clean. Gently press on the batter to spread it across the parchment paper. The disc you are spreading will turn out to be quite thin.
If you feel like your hands are sticking onto the batter, dip your fingertips in the flour OR sprinkle just a tiny bit of flour on top of the batter and keep on spreading it. if you make a hole in the middle of the disc, don’t fret! Just grab a little from a thicker end and patch it up.
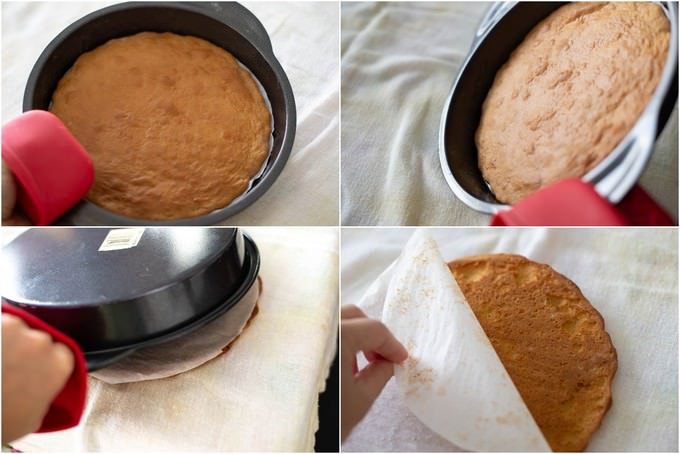
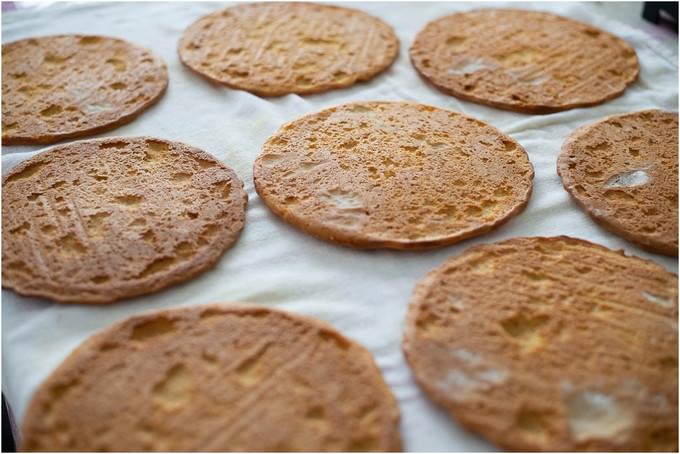
Place the baking pan in the hot oven and bake it for about 6 minutes OR until the color of the batter turns a nice golden brown color. You can make it a little lighter if you wish. The lighter the batter, the softer the cake. I prefer my cake to be a little on the golden brown side. Your best bet is to orient yourself on the color of the layers rather than the time it takes baking it. Everyone’s oven is different and some might bake within minutes. So, regulate it out for yourselves.
Place a couple of dish towels on the dinner table or the kitchen counter. Once the layers have baked, remove the pan from the oven and flip over the baked layers onto the towels. Gently remove the parchment paper from the honey layers. Let the layers cool down. Re-use the parchment paper for the rest of the batter baking. Below is another way you can spread the batter on the parchment paper.
Spreading a little bit of flour on the allocated 2 TBSP of batter, before you spread it on parchment paper is essential for this particular recipe. Be ever so sparing with the flour, please. You do not need a lot.
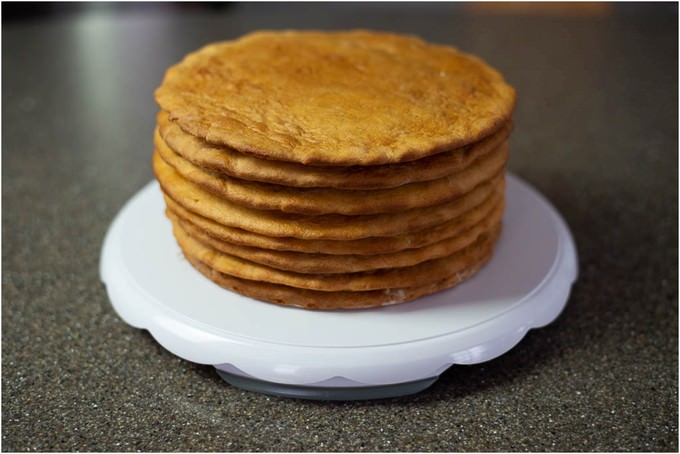
After all said and done, you will have eight layers ready from the batter. One will be used as a decoration. The rest of the seven will be layered along with the frosting.
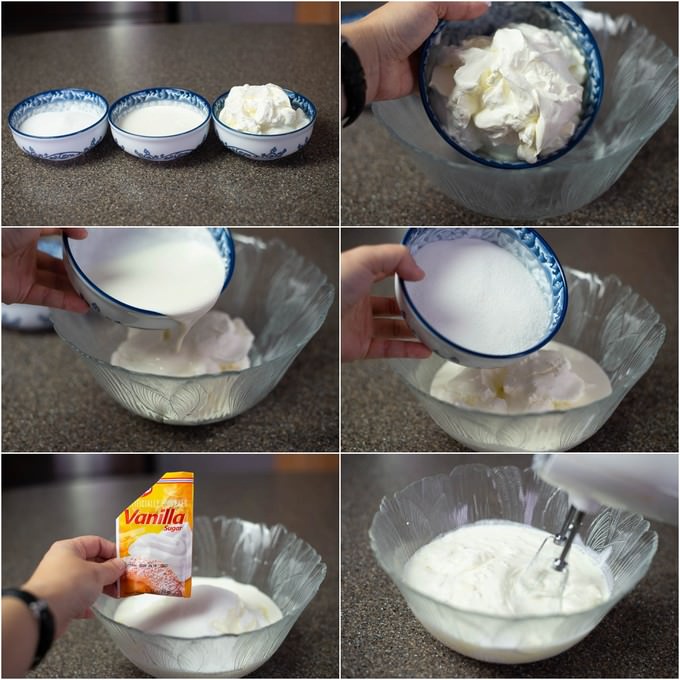
In a medium bowl place all of the frosting ingredients and whisk with a handheld mixer (or with whatever mixer you have!)
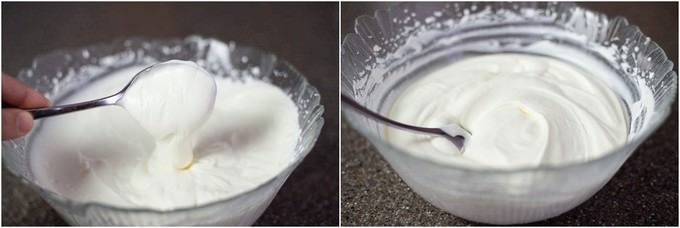
The frosting should not be too thick. Whisk for about 5 minutes. When you use a spoon, the frosting should barely slide off the spoon. It should be spreadable, not runny, but at the same time not too thick.
Look at these perfectly uniform layers of golden honey cake! YUMMY!
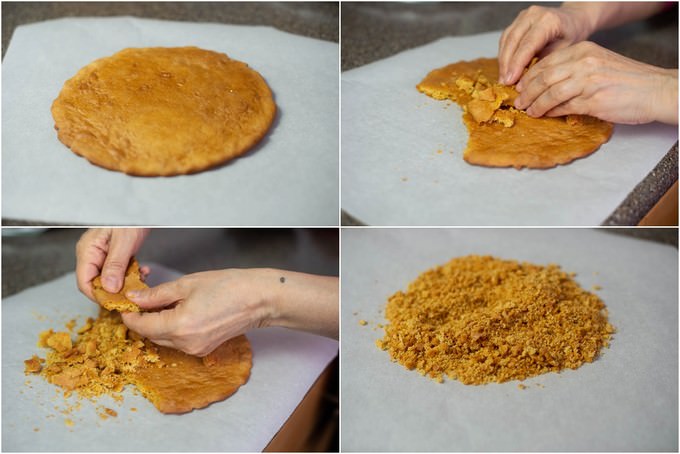
Break down one of the layers with your hands. Since our layers are nice and airy, they will break up quite easily.
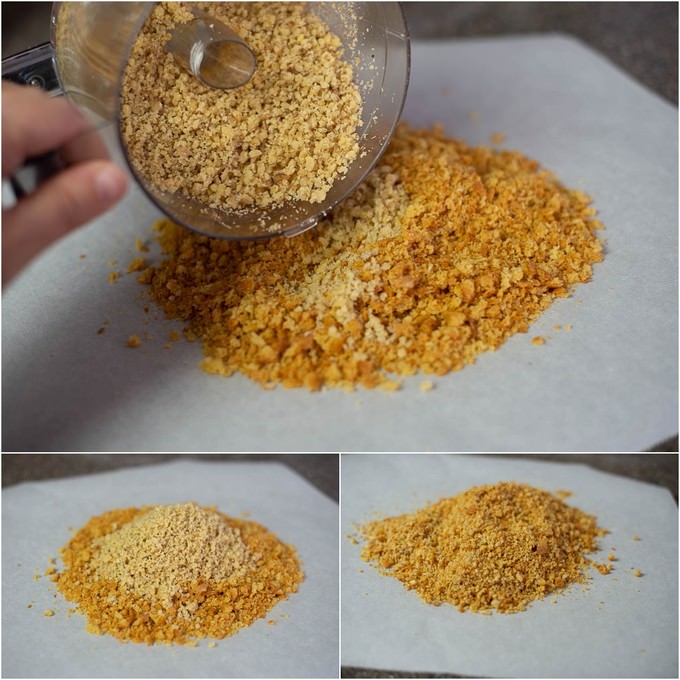
Add chopped walnuts into the honey cake crumbles and mix it all together. Set aside until you are done with putting the cake together.
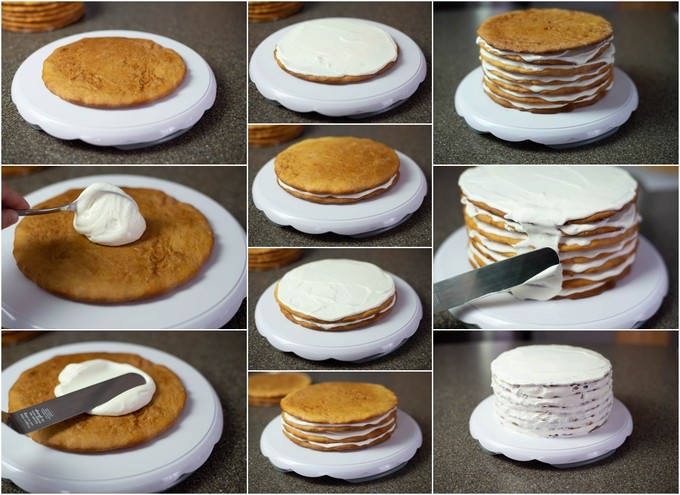
Place the first layer of the cake on to a dish that is big enough to accommodate the cake and can go into the refrigerator. I use about 2 and a half tablespoons full of frosting on each layer. Technically, you shouldn’t be able to see the color golden from under the frosting. Spread the frosting on to the first layer, and continue doing so layer after layer until you are done with the 7th one. Spread the remaining frosting on the sides of the cake.
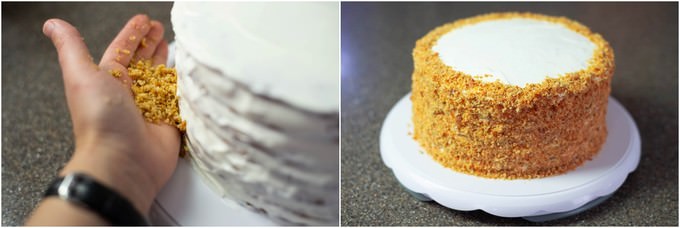
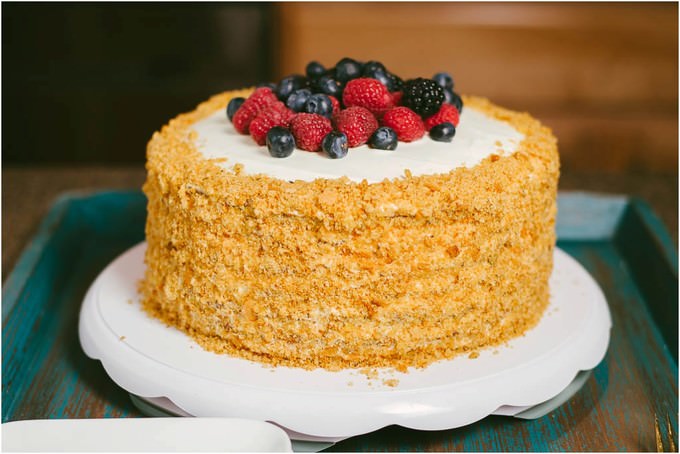
Carefully adorn the nut and crumble mixture on the side of the cake. You can spread the same mixture on top of the cake and have a uniform look to it. Or you can go a little wild and decorate it with pieces of fruit. Honey cake goes very well with the addition of fruit or berries. Give it a try!
At the end of it all, you will have this very delicious looking and divine tasting masterpiece for your enjoyment. That wasn’t hard at all, was it? :) Keep the cake refregirated overnight. Or at least let it rest and soak up the frosting goodness for good 4-5 hours.
If you have any questions, please reach out to me. All of the recipes I post are tried and tested for many, many years. I can always share an experience with you or give you a pointer if you need one. Thank you for giving my recipes a try!
Honey Cake Recipe
Ingredients
- 3 large eggs
- 100 gr granulated sugar
- 150 gr honey
- 113 gr unsalted butter
- 1-1/2 Tsp baking soda
- 1 – 1/2 Tsp lemon juice or vinegar
- 350 gr all purpose flour + a little extra
- 50 gr chopped walnuts for decoration (optional)
- 500 gr sour cream
- 200 gr heavy whipping cream
- 150 gr sugar
- 1 tsp vanilla sugar or 1/2 tsp vanilla extract
Instructions
- Have a large pot, suitable to hold a medium size bowl as a water bath (also known as bain-marie method). Have a little water boiling in this large pot while you are mixing initial ingredients of the dough. In a medium bowl crack the eggs, agitate them a little with a whisk, add sugar and honey. Mix everything well with a whisk.
- Transfer the honey mixture on top of the pot with boiling water (for the water bath, as shown in the photos). Turn the heat down to medium (no need to make an omelet out of the eggs), add butter into the honey bowl and continuously whisk the mixture until the butter is completely incorporated. This method will also melt the sugars and renders the batter base very pliable and quite workable. Once the butter has completely incorporated into the rest of the mixture. Turn the heat down and keep the batter on the water bath until you mix the baking soda with the lemon juice.
- Do this very quickly. In a small cup mix baking soda with either lemon juice OR vinegar.
- Remove the batter from the water bath and quickly work in the baking soda mixture into the batter. The batter will turn a little whitish during this process.
- Add half of the flour into the batter and mix it in with a spoon. You don’t really need a whisk anymore. The flour will incorporate fairly well, without clumping.
- Add the second half of the flour and gently incorporate it. This time it will take a little more effort since the dough is going to start thickening. Within 1 minute you will have a dough the consistency of which should remind you of a thick pancake batter (maybe even a little thicker).
- use two 9-inch baking pans to bake the round layers of honey cake. Using two pans helps expedite the process of baking the layers.
- Turn the oven on to 390F.
- Grab a tablespoon and place 2 heaping tablespoons of the batter right in the middle of the parchment paper. You will need to have an additional teaspoon handy to help you scrape the batter off of a tablespoon on to the parchment surface. Sprinkle a little flour on top of the batter to help you spread it. Don’t be scared of this step. Your hands will remain almost clean. Gently press on the batter to spread it across the parchment paper. The disc you are spreading will turn out to be quite thin.
- If you feel like your hands are sticking onto the batter, dip your fingertips in the flour OR sprinkle just a tiny bit of flour on top of the batter and keep on spreading it. if you make a hole in the middle of the disc, don’t fret! Just grab a little from a thicker end and patch it up.
- Place the baking pan in the hot oven and bake it for about 6 minutes OR until the color of the batter turns a nice golden brown color. You can make it a little lighter if you wish. The lighter the batter, the softer the cake. I prefer my cake to be a little on the golden brown side. Your best bet is to orient yourself on the color of the layers rather than the time it takes baking it. Everyone’s oven is different and some might bake within minutes. So, regulate it out for yourselves.
- Place a couple of dish towels on the dinner table or the kitchen counter. Once the layers have baked, remove the pan from the oven and flip over the baked layers onto the towels. Gently remove the parchment paper from the honey layers. Let the layers cool down. Re-use the parchment paper for the rest of the batter baking.
- In a medium bowl place all of the frosting ingredients and whisk with a handheld mixer (or with whatever mixer you have!) The frosting should not be too thick. Whisk for about 5 minutes. When you use a spoon, the frosting should barely slide off the spoon. It should be spreadable, not runny, but at the same time not too thick.
- Break down one of the layers with your hands. Since our layers are nice and airy, they will break up quite easily. Add chopped walnuts into the honey cake crumbles and mix it all together. Set aside until you are done with putting the cake together.
- Place the first layer of the cake on to a dish that is big enough to accommodate the cake and can go into the refrigerator. I use about 2 and a half tablespoons full of frosting on each layer. Technically, you shouldn’t be able to see the color golden from under the frosting. Spread the frosting on to the first layer, and continue doing so layer after layer until you are done with the 7th one. Spread the remaining frosting on the sides of the cake.
- Carefully adorn the nut and crumble mixture on the side of the cake. You can spread the same mixture on top of the cake and have a uniform look to it. Or you can go a little wild and decorate it with pieces of fruit. Honey cake goes very well with the addition of fruit or berries. Give it a try!

This honey cake sure looks delicious…And I’m so glad that your recipe is in grams. Thanks for sharing! I would try this soon. =)
Hi Trish, I am so, so glad you like the looks of this cake! I also think going “grams” is such a better choice. That being said, I have so many recipes which need to be converted. Let me know when you try it out? I hope you like it. Xoxo!
Oh Wow, Lola!!! That looks so yummy.
I’ll definitely try this recipe.
I’m so happy to see you cooking/baking again. I missed you. xx
MAYA! It is so nice to see your comment. I hope you like the cake. A couple of my friends tried it to give some feedback. All of theirs turned out very well. I am planning on sticking around for a while, hopefully :) Hope to see you more often, too.
Can these layers be made and frozen a few days before icing and serving?