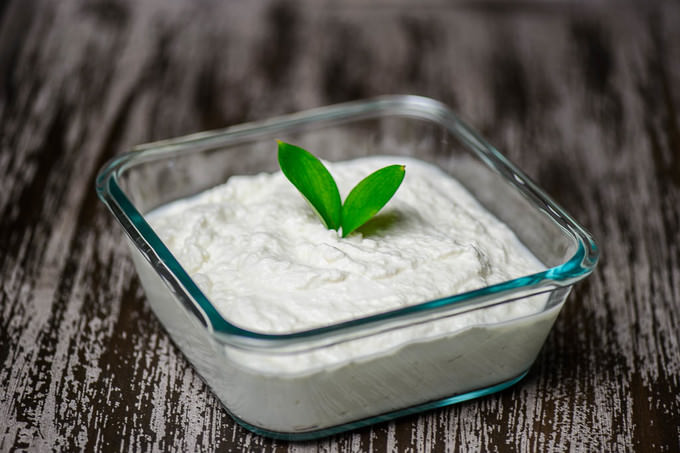
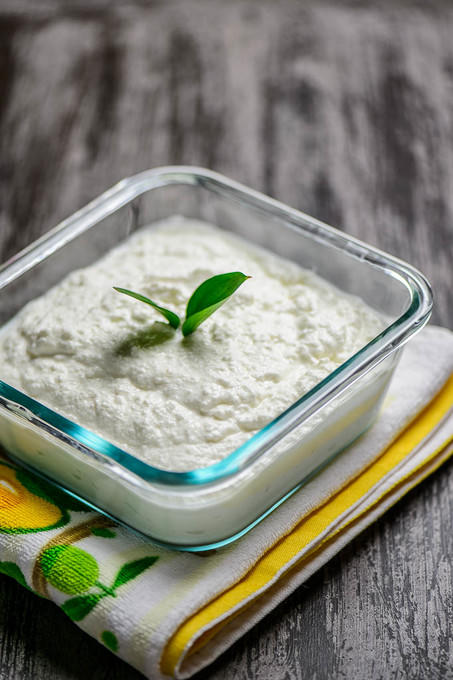
Today I am introducing Farmer’s cheese recipe to your attention. Farmer’s cheese is somewhat similar to cottage cheese, with cottage cheese having larger curds. Farmer’s cheese is much less grainy and typically does not have an addition of salt. Farmer’s cheese recipe is very popular in Russia and ex-soviet countries. It is also an amazing addition to those of us who need a perfect mid day snack. Farmer’s cheese can be dressed up with berries, fruits, sour cream and a little honey.
It is very high in protein and fat, and is extremely filling. I find it a perfect snack recipe for those who enjoy a Keto lifestyle. It should equally work for everyone who is watching what they are consuming. This recipe will approximately yield 1-1/2 lb of farmer’s cheese, and will be around 220 calories per serving (2 oz).
This particular Farmer’s cheese has been in the making for good two years. I photographed it in 2015 and never got to post it. There are at least 5-6 methods of making Farmer’s cheese. The method I will share with you today is only one of them and also happens to be one of the quickest. More will come soon, I promise. Don’t let the recipe intimidate you. It is really a very easy recipe. I just like to give you as many details to have all the basis covered.
Notes:
*The fattier the content of the milk and the yogurt you chose, the higher the yield of the Farmer’s cheese.
*Muslin is easier to use since you can strain it, press to get extra whey out and not worry about cheese curds sticking to it.
Cheese cloth may not give you such flexibility, unless you find one with very fine and strong netting
Ingredients:
- 1 gallon of whole milk
- 24 oz of full fat greek yogurt
- 2 TBSP vinegar
- 2 TBSP water
Additional utensils needed:
- 1 large heavy-bottomed pot for cooking cheese
- 1 large strainer
- cheese cloth or muslin (enough to fold into several layers and hang over the edges of a strainer) 1 layer of muslin is enough if that’s what you are going to use
- slotted spoon
- big container or a colander
Directions:
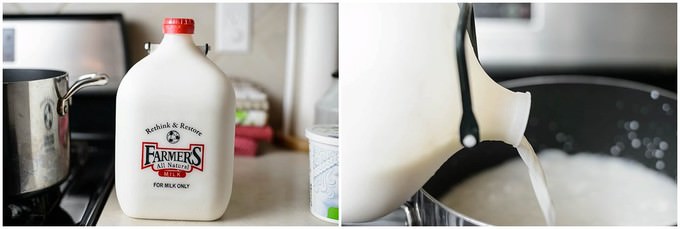
Place the pot on the stove and turn the heat on to medium. Add 2 TBSP of water to the pot (my mother-in-law swears by this method) in order to prevent the milk from burning on the bottom, and than add the milk.
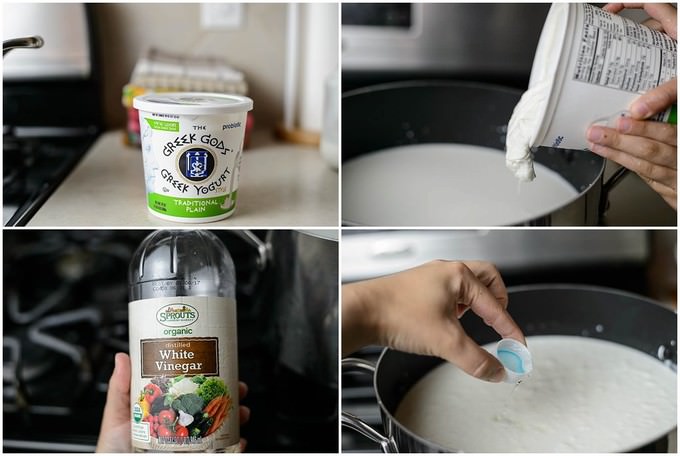
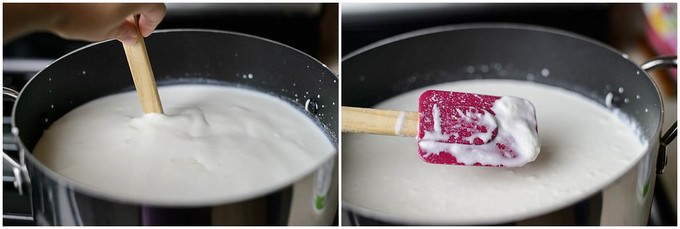
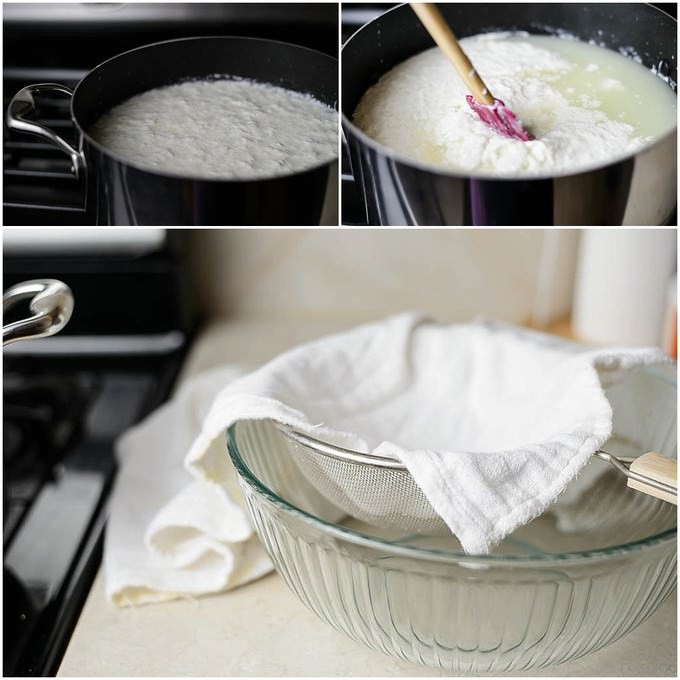
Give the greek yogurt a good stir and add to the milk. Add 2 TBSP of vinegar. Using a wooden spoon gently stir the mixture and slowly cook the milk. After this point I do not recommend stirring the mixture. The more you stir the more you will disturb the curds from fully forming. The curds will keep on disintegrating into whey if you keep stirring. At this point TURN THE HEAT DOWN to LOW.
Leaving the heat on for too high of a temperature will burn the milk and add a bitter taste to the Farmer’s cheese. The milk mixture will not come to boil, nor should you make it boil. It needs to heat up just enough to separate the whey from cheese curds. Since you know your stove the best, your best indicator for temperature is to see when the milk starts to simmer. As soon as you see this happening, turn the heat to its lowest and give the mixture about 10 more minutes for the curds to fully separate.
When the time is up and you see curds have separated from the whey, turn the heat off and let the mixture sit undisturbed for 10 more minutes.
Note: In order to separate the Farmer’s cheese from the whey you may want to move everything closer to the sink. That way if there is a mess, you will be able to clean it up easily. I like to use the leftover whey for other dishes, so, I keep some and I a toss some into the sink. Whichever method works best for you.
Place the colander next to the pot with the cheese, hang the strainer on the edges of the colander and line it with a cheese cloth/muslin (I fold the cheese cloth in 4 to have a thicker liner. This way I will catch most of the curds). Using a slotted spoon gently gather all the curds and place them on the cheese cloth or muslin. Let the whey drain and place the Farmer’s cheese on a separate container.
Put back the cheese cloth or muslin on the strainer and pour over the entire whey through it. This will help you get the remaining curds from the whey. This process is not a long one. Don’t be intimidated. Let the rest of the curds drain well. Once that’s done take the remaining farmer’s cheese and add to the first batch. Remember, the more you drain, the drier Farmer’s cheese you will have. For baking it is best to have dry Farmer’s cheese. For consuming with fruits and honey, it doesn’t really matter if it is well strained or not.
Farmer's Cheese Recipe
Ingredients
- 1 gallon of whole milk
- 24 oz of full fat greek yogurt
- 2 TBSP vinegar
- 2 TBSP water
- ADDITIONAL UTENSILS NEEDED:
- 1 large heavy-bottomed pot for cooking cheese
- 1 large strainer
- cheese cloth or muslin enough to fold into several layers and hang over the edges of a strainer 1 layer of muslin is enough if that’s what you are going to use
- slotted spoon
- big container or a colander
Instructions
- Place the pot on the stove and turn the heat on to medium. Add 2 TBSP of water to the pot (my mother-in-law swears by this method) in order to prevent the milk from burning on the bottom, and than add the milk.
- Give the greek yogurt a good stir and add to the milk. Add 2 TBSP of vinegar. Using a wooden spoon gently stir the mixture and slowly cook the milk. After this point I do not recommend stirring the mixture. The more you stir the more you will disturb the curds from fully forming. The curds will keep on disintegrating into whey if you keep stirring. At this point TURN THE HEAT DOWN to LOW.
- Leaving the heat on for too high of a temperature will burn the milk and add a bitter taste to the Farmer’s cheese. The milk mixture will not come to boil, nor should you make it boil. It needs to heat up just enough to separate the whey from cheese curds. Since you know your stove the best, your best indicator for temperature is to see when the milk starts to simmer. As soon as you see this happening, turn the heat to its lowest and give the mixture about 10 more minutes for the curds to fully separate.
- When the time is up and you see curds have separated from the whey, turn the heat off and let the mixture sit undisturbed for 10 more minutes.
- Place the colander next to the pot with the cheese, hang the strainer on the edges of the colander and line it with a cheese cloth/muslin (I fold the cheese cloth in 4 to have a thicker liner. This way I will catch most of the curds). Using a slotted spoon gently gather all the curds and place them on the cheese cloth or muslin. Let the whey drain and place the Farmer’s cheese on a separate container.
- Put back the cheese cloth or muslin on the strainer and pour over the entire whey through it. This will help you get the remaining curds from the whey. This process is not a long one. Don’t be intimidated. Let the rest of the curds drain well. Once that’s done take the remaining farmer’s cheese and add to the first batch.
Notes
*The fattier the content of the milk and the yogurt you chose, the higher the yield of the Farmer’s cheese.
*Muslin is easier to use since you can strain it, press to get extra whey out and not worry about cheese curds sticking to it.
Cheese cloth may not give you such flexibility, unless you find one with very fine and strong netting.
* In order to separate the Farmer’s cheese from the whey you may want to move everything closer to the sink. That way if there is a mess, you will be able to clean it up easily. I like to use the leftover whey for other dishes, so, I keep some and I a toss some into the sink. Whichever method works best for you.
* Remember, the more you drain, the drier Farmer’s cheese you will have. For baking it is best to have dry Farmer’s cheese. For consuming with fruits and honey, it doesn’t really matter if it is well strained or not.

Leave a Reply