This recipe of how to make farmer’s cheese will be most useful for those who have kefir grains and who actively make kefir. The recipe makes versatile, delicious soft cheese! When you have an abundance of Kefir, farmer’s cheese is one more thing you can cook up with a little effort.
If you do not have grains and still want to enjoy farmer’s cheese, CLICK here for another recipe, which will not involve usage of kefir (from grains, per se). I will add a couple of more techniques of making farmer’s cheese in the near future.
Lately, I started making kefir from the grains just for the sake of farmer’s cheese! The farmer’s cheese from kefir comes out very rich, with just enough curds and has a pleasantly smooth texture. I also obtain quite a bit of farmer’s cheese from using this method than any other conventional methods of making this cheese. Suffice to say that I stopped making farmer’s cheese any other way.
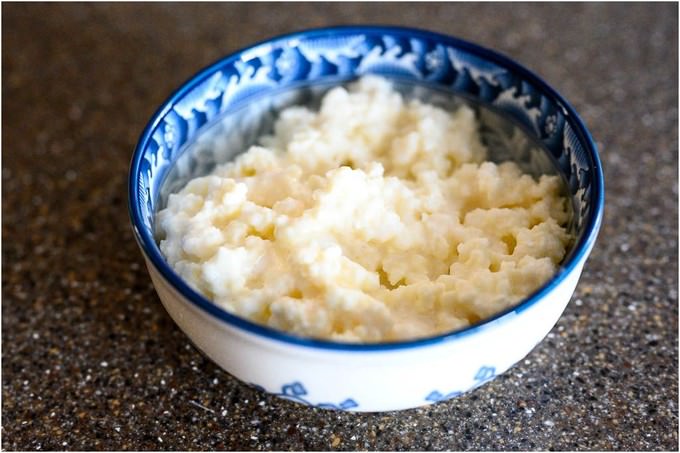
About 6 years ago my older brother got very interested in kefir making. After some research, he decided to purchase kefir grains from someone in Australia, who claimed he had one of the older grain strains from Caucasus mountains. Around that time and after my brother graciously shared some of the kefir grains with me, we did a lot of research on the health of the grains, how to take care of them and what to watch for in order to have a healthy, prospering culture in our hands. So, for the past 6 years, we’ve been reaping the benefits of this spectacular product.
Obtaining or buying kefir grains is quite easy. With a little research online, you should be able to purchase some for your home use. As my grains multiply quickly, I’ve been sharing mine with my friends or whoever is interested in making kefir and other kefir products.
Let’s discuss farmer’s cheese, shall we? Making farmer’s cheese is easy IF you’ve made it many times over and know exactly what you are doing. I am not going to sugar coat it and tell you that it is going to be a breeze the first time you make it. However, I will try my best to ease your job and help you make this method a success.
To obtain more farmer’s cheese we are going to be using milk and kefir. I leave my grains “sit” in Kefir a little longer than 24 hours (which is a normal time for obtaining healthy kefir, with plenty of vitamin B and a good amount of probiotics ). Leaving grains in kefir for longer makes it a little sourer. The sourness of kefir alone is enough to coagulate milk in order to obtain a maximum amount of farmer’s cheese every time.
Ingredients:
- 1 gallon of whole milk (approx. 4 liters)
- 1/2 gallon kefir (2 liters)
- *2 TBSP vinegar (not needed for the recipe, but MAY be used)
Tools:
- Large cooktop-safe pot
- Spatula
- Large sieve
- Slotted Spoon
- Cheesecloth or a large mesh
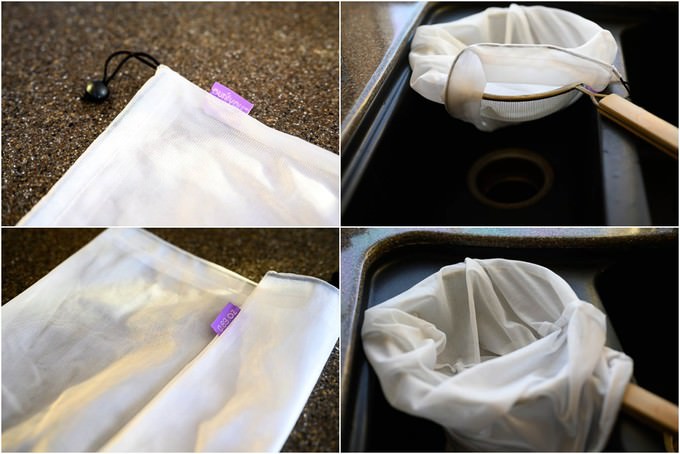
Note: The method I use to separate cheese from whey is a breeze thanks to the mesh I use. This mesh is everything for me. Dairy tends to leave a smell on cheesecloth and, God does the smell linger. This mesh washes easily and there is absolutely no smell. Please order the appropriately sized one. I promise you will be using it a LOT.
Directions:
You will need a large pot which will accommodate the amount of dairy you have in order to cook the farmer’s cheese.
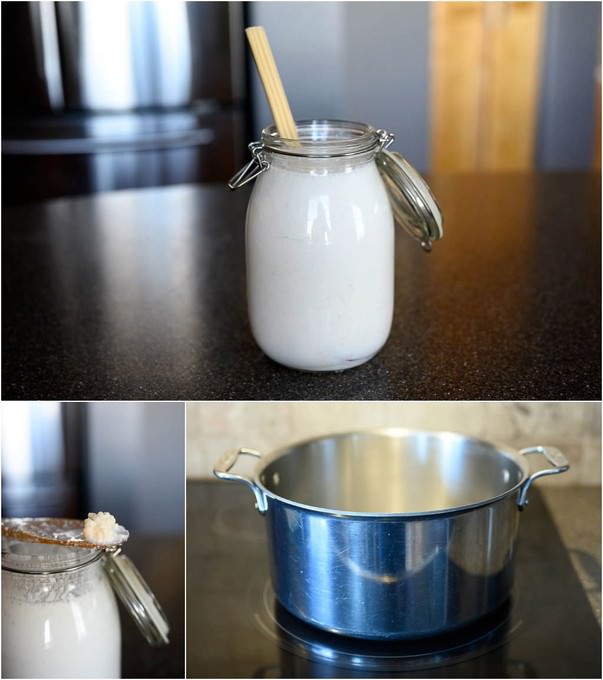
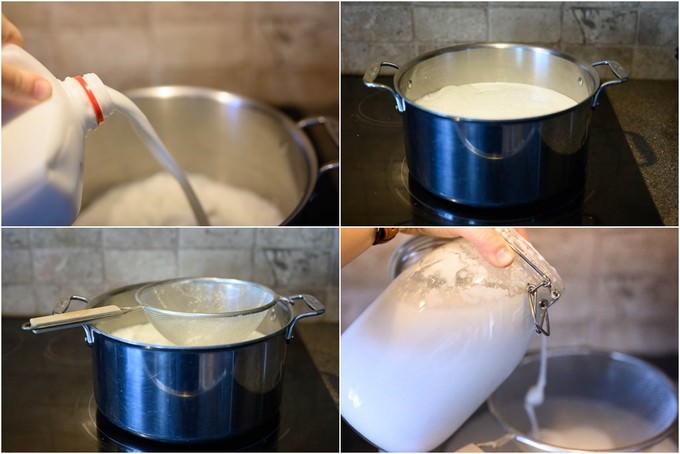
Pour the milk into the large pot, add the kefir. You can add already separated kefir. I often separate the kefir from grains right before using it for the farmer’s cheese.
Since the bottom of sieve touches the milk in the pot, this also gives me an opportunity to give kefir grains a little milk wash ( not necessary and has nothing to do with the recipe, lol). Once you’ve added all the kefir to the milk, stir the pot with a big spoon or a spatula. From this point on no more stirring the pot. Just gentle checking, the way I will describe below.
IMPORTANT STEPS:
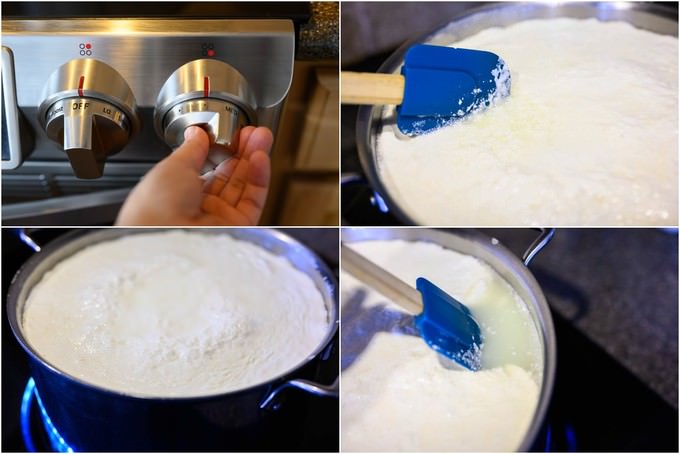
Heat is one of the most important aspects of making an amazing farmer’s cheese. A good farmer’s cheese cannot be cooked on high heat. Since I do not use a thermometer, I can only teach you to understand your cooktop. I always set my conduction cooktop on low-medium (4). If you are using a gas stove, please adjust the heat accordingly. Under no circumstances should the liquid should boil or even simmer!
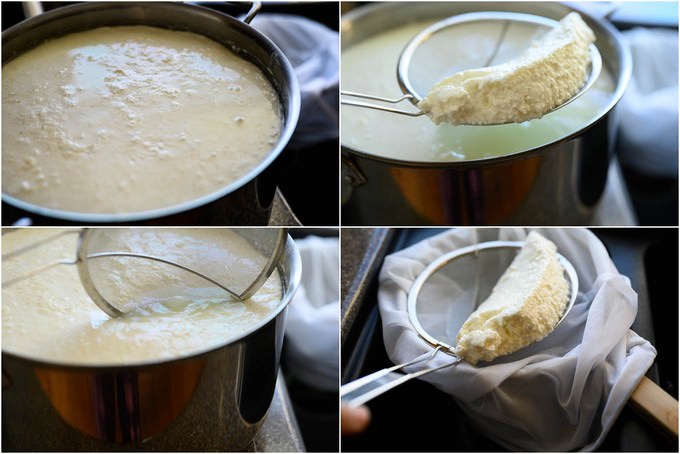
Let the heat work its way around the pot. It will take about 20 minutes before you will start seeing small bubbles forming on the surface of the cheese. Bubbles indicate that the cheese is forming and the milk+kefir coagulating into cheese curds. Within 5 minutes or so, you will see a small dome forming in the middle of the pot. At this time using a spatula, gently press in (into the heated liquid) the areas of the surface where the milk hasn’t coagulated. TURN THE HEAT DOWN TO LOW and let the pot sit there for another 10-15 minutes.
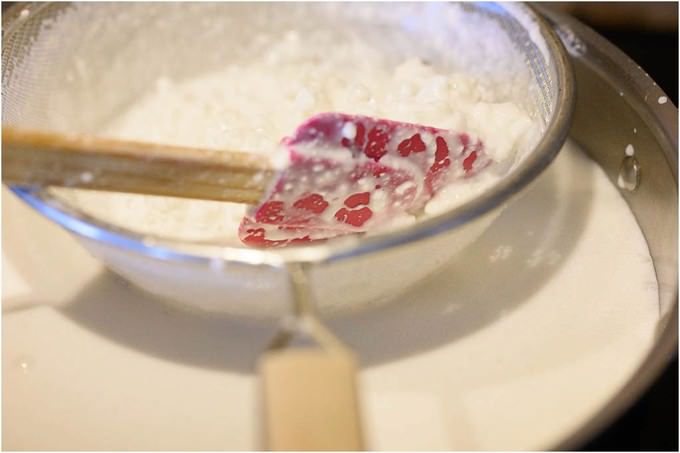
Once the time is up, gently press the cheese on the sides of the pot to see if the cheese has formed (as in the above photo). The curds will separate from the whey. The formation should be at least 3-4 inches thick. Whey should not be too white or off white. It should be somewhat clear, closer to yellowish color. This will mean that you obtained the most amount of curd from milk+kefir.
CAUTION: If This isn’t the case and you will see quite a bit of white in your whey (too milky?) and the thickness of the cheese is too low or the curds haven’t formed within the time frame mentioned above, the kefir wasn’t strong enough to coagulate the milk. Don’t freak out, though. There is a fix for the situation. Add 2 TBP of vinegar into the milky whey, gently woosh around with a spatula and keep the heat on low until you have achieved a good separation and coagulation.
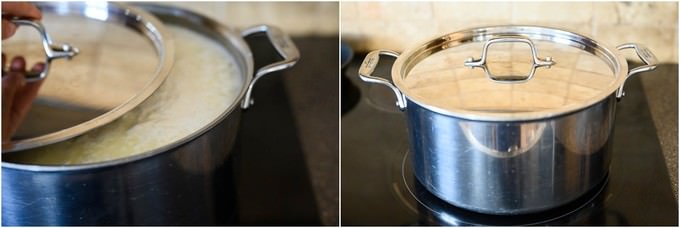
Once you’ve reached the desired result, turn the heat off and cover the pot with a lid. Let the farmer’s cheese cool down before you sieve the whey out.
I use a large sieve and put my favorite mesh around it. Hang the sieve securely on another large pot, or hang it over your sink.
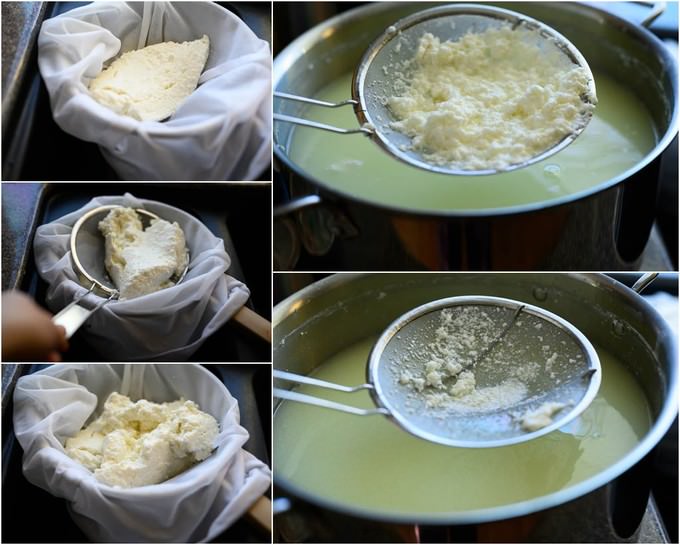
Slowly start spooning out the cheese curds with a slotted spoon and place it inside the mesh.
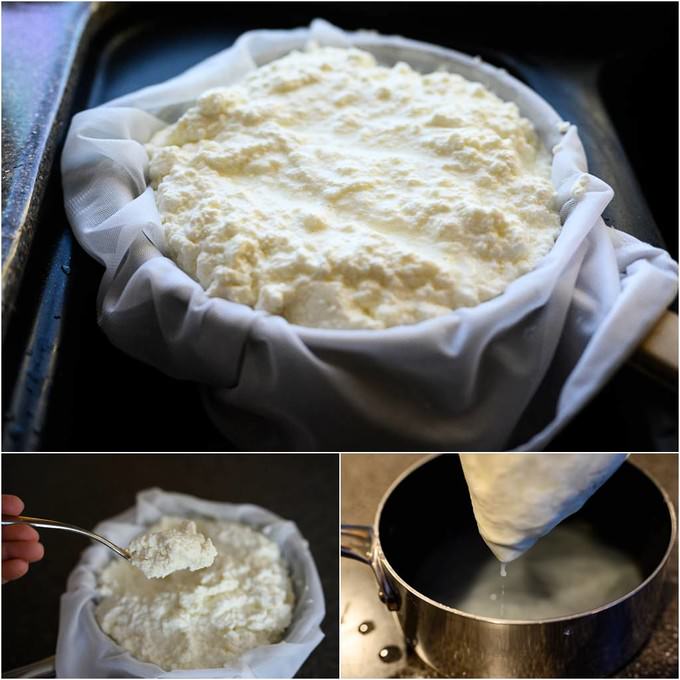
Continue until you’ve fished out most of the curds. You could just dump the entire pot over the sieve. But you will end up with a huge mess. You’ve come so far, be patient now :)
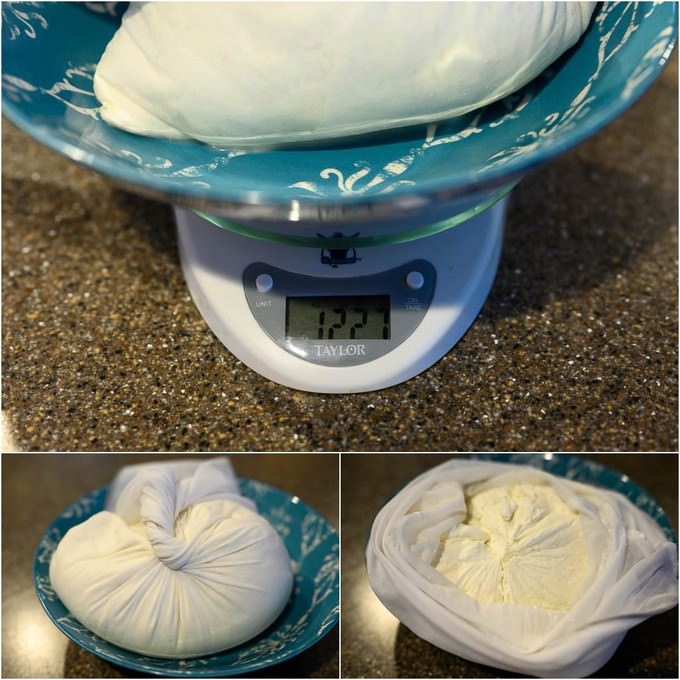
Let the excess whey drain from under the farmer’s cheese. If you want to expedite this process, just squeeze out the excess liquid from the mesh.
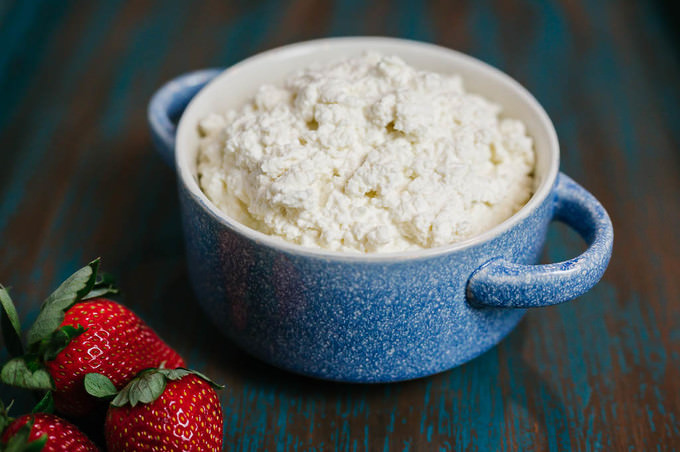
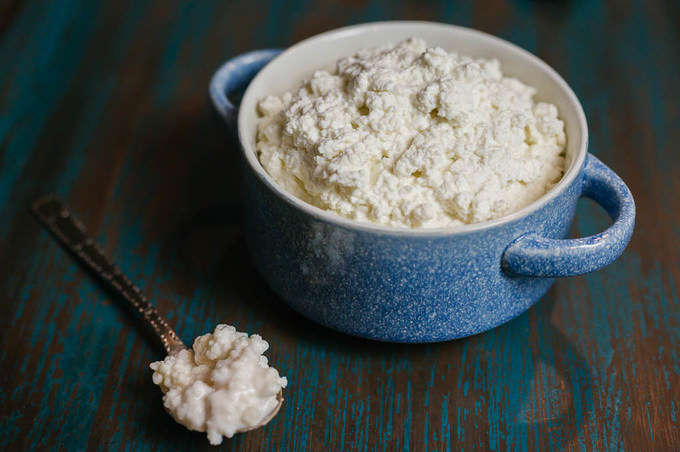
In total, using this method you will obtain 1227 grams of amazing farmer’s cheese. That’s whopping 2.6 pounds of deliciousness! Place the cheese in the airtight container and refrigerate. It stays very fresh for a week. You can enjoy it with fruits, sour cream, honey, etc. If I have any left afterward, I use it up in pancakes, cookies, pies and in lasagna (just add a little water and pulse the cheese in your blender – voila ricotta!)
If you have any questions, please feel free to drop me a line. If I have made a mistake anywhere in the recipe, and you caught it, I will be forever grateful for your help. With much love,
Lola
How to Make Farmer's Cheese
Ingredients
- INGREDIENTS:
- 1 gallon of whole milk approx. 4 liters
- 1/2 gallon kefir 2 liters
- *2 TBSP vinegar not needed for the recipe, but MAY be used
- TOOLS:
- Large cooktop-safe pot
- Spatula
- Large sieve
- Slotted Spoon
- Cheesecloth or a large mesh
Instructions
- You will need a large pot which will accommodate the amount of dairy you have in order to cook the farmer’s cheese. Pour the milk into the large pot, add the kefir. You can add already separated kefir. I often separate the kefir from grains right before using it for the farmer’s cheese.
- Since the bottom of sieve touches the milk in the pot, this also gives me an opportunity to give kefir grains a little milk wash ( not necessary and has nothing to do with the recipe, lol). Once you’ve added all the kefir to the milk, stir the pot with a big spoon or a spatula. From this point on no more stirring the pot. Just gentle checking, the way I will describe below.
- Heat is one of the most important aspects of making an amazing farmer’s cheese. A good farmer’s cheese cannot be cooked on high heat. Since I do not use a thermometer, I can only teach you to understand your cooktop. I always set my conduction cooktop on low-medium (4). If you are using a gas stove, please adjust the heat accordingly. Under no circumstances should the liquid should boil or even simmer!
- Let the heat work its way around the pot. It will take about 20 minutes before you will start seeing small bubbles forming on the surface of the cheese. Bubbles indicate that the cheese is forming and the milk+kefir coagulating into cheese curds. Within 5 minutes or so, you will see a small dome forming in the middle of the pot. At this time using a spatula, gently press in (into the heated liquid) the areas of the surface where the milk hasn’t coagulated. TURN THE HEAT DOWN TO LOW and let the pot sit there for another 10-15 minutes.
- Once the time is up, gently press the cheese on the sides of the pot to see if the cheese has formed (as in the above photo). The curds will separate from the whey. The formation should be at least 3-4 inches thick. Whey should not be too white or off white. It should be somewhat clear, closer to yellowish color. This will mean that you obtained the most amount of curd from milk+kefir.
- Once you’ve reached the desired result, turn the heat off and cover the pot with a lid. Let the farmer’s cheese cool down before you sieve the whey out.
- I use a large sieve and put my favorite mesh around it. Hang the sieve securely on another large pot, or hang it over your sink.
- Slowly start spooning out the cheese curds with a slotted spoon and place it inside the mesh.
- Continue until you’ve fished out most of the curds. You could just dump the entire pot over the sieve. But you will end up with a huge mess. You’ve come so far, be patient now :)
- Let the excess whey drain from under the farmer’s cheese. If you want to expedite this process, just squeeze out the excess liquid from the mesh.
Notes

is this sorta the same as ricotta cheese?
Hello Olivia! Thank you for visiting my blog. In a way you could say farmer’s cheese is somewhat similar to ricotta. The biggest difference is consistency. Ricotta is mainly made out of whey and not the milk. Hence the name “cooked again”. Ricotta is much softer and at times could be a little saltier than farmer’s cheese. Farmer’s cheese is much denser and might be a little fattier, too (depending on the fat % of the milk). However, they both can be used interchangeably, in my opinion. Ricotta will need to be strained to thicken or farmer’s cheese can be diluted with a little water and blended in a stand mixer. Let me know if this answers your question ❤️