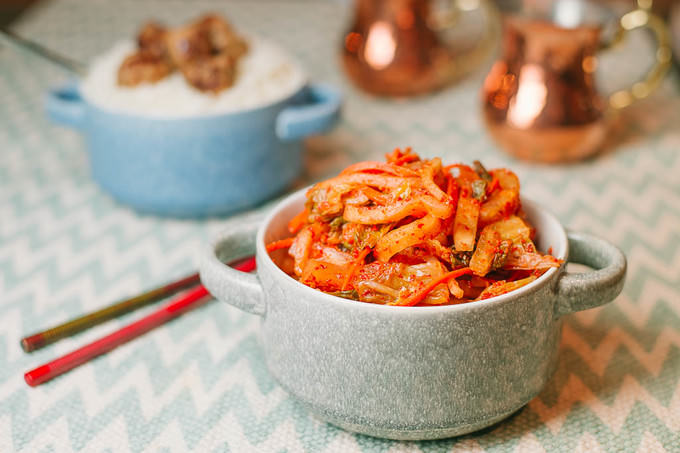
This is a super easy kimchi recipe, you can whip up very quickly. It also ferments much faster, which means you can have your kimchi in less than a week! The whole truth about Kimchi is that you either love it or hate it. But I absolutely encourage you to give it a couple of tries with this Kimchi recipe before you might completely diss it. While many ingredients in this kimchi might turn you off (garlic, fish sauce, onions, radishes, etc.) always remember that you can either limit or completely omit these ingredients in order to have something that completely becomes up your alley. Ready to venture into this Kimchi recipe?
Kimchi brings back very fond memories of my childhood. Although my heritage is not Korean, we had many friends and neighbors of Korean origin. Korean food infused itself into our Central Asian nook and we welcomed it with an open heart. My grandmother used to make big batches of Kimchi when I was a child, and a simple white or rye bread fresh from the oven, paired with kimchi used to make my day! Kimchi was a staple in our winter food list, as it is a fermented food. While we ate foods seasonally, many seasonal vegetables were not available during the winter months. Fermented cabbages and vegetables such as kimchi brought the much missing balance into our winter regimen.
The importance of incorporating fermented vegetables into your diet is unquestionable unless you have severe sensitivities to the ingredients that are in Kimchi, for example. I will write a separate post on this matter. Meanwhile, let’s get on with this Kimchi recipe.
Which Hot Pepper to Choose?
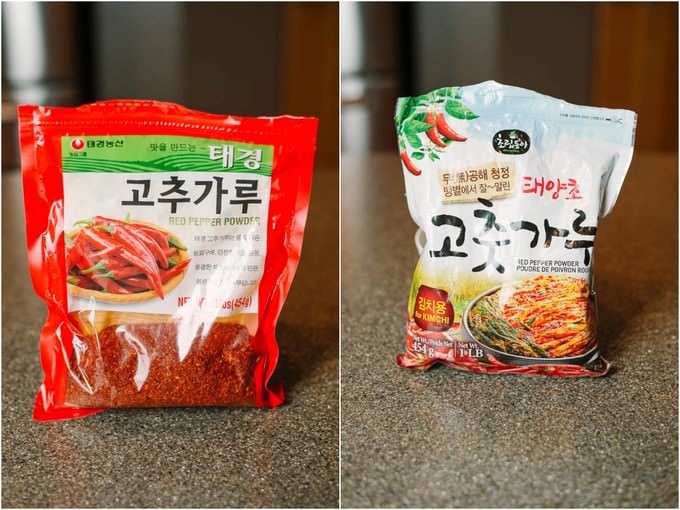
You absolutely need to be careful with the type of hot pepper you pick for making a successful Kimchi. Beware that this is not your regular chili pepper. If you end up using chili pepper instead of Gochugaru (Korean chile pepper, which is milder and sweeter in taste), you will literally have a “HOT” mess on your hands. With the amount of chile pepper that you need for Kimchi, regular chili pepper flakes will burn anything off in contact, ha-ha! You can find Gochugaru online (just click on the link) or you can purchase some in your local Asian grocery stores. Trader Joe’s or Sprouts Farmers Markets will probably carry Gochugaru, too.
In the above photo, I have two types of Gochugaru peppers. The one on the left is a spicier variety, the one on the right is a sweeter variety. You can go with either one. I like to mix them 50/50 because that’s how spicy my family likes it’s Kimchi. If you have further questions, please feel free to drop me a line. I will always respond to you!
Ingredients:
Note: These ingredients will cover half of what I made. I like to make a bigger batch because I am not the only one eating it. Don’t let the volume in the photos confuse you. In case you want to make a bigger batch, increase the ingredients accordingly.
- 1 large size Napa Cabbage
- 1 medium carrot, julienned (or mandolined)
- 1 small diakon radish Korean radish (optional, but we love the crunch)
- 1/2 cup Kosher salt
- 4 cloves of garlic
- 1 small onion
- 1/2 Korean Pear (for sweetness and better fermentation), If need be sub it with another type of pear
- 2 inches of Ginger
- 2 TBSP fish sauce
- 1/2 cup Gochugaru (in my case it is 1/4 mild, 1/4 medium)
- 1/4 cooked, White Rice (for fermentation)
- 1/4 cup Water
Directions:
No need to wash the cabbage in the beginning, as you will be washing it well after soaking it in salt.
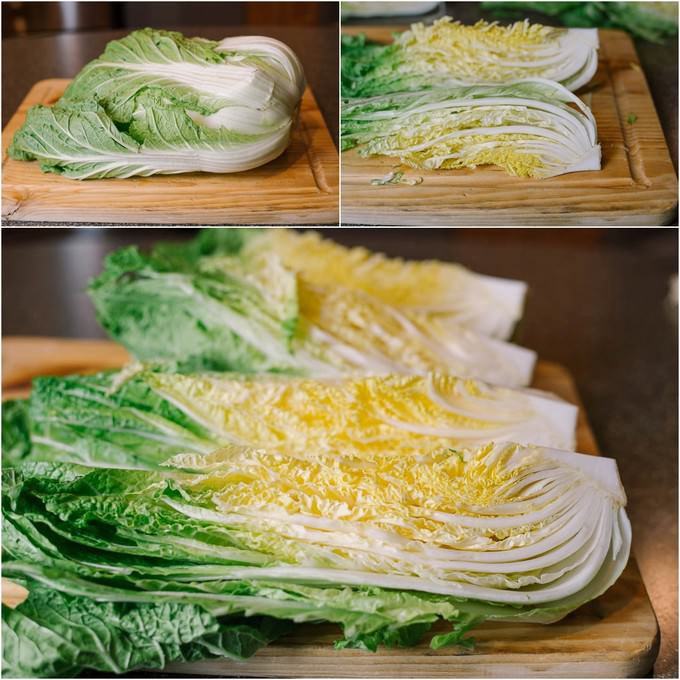
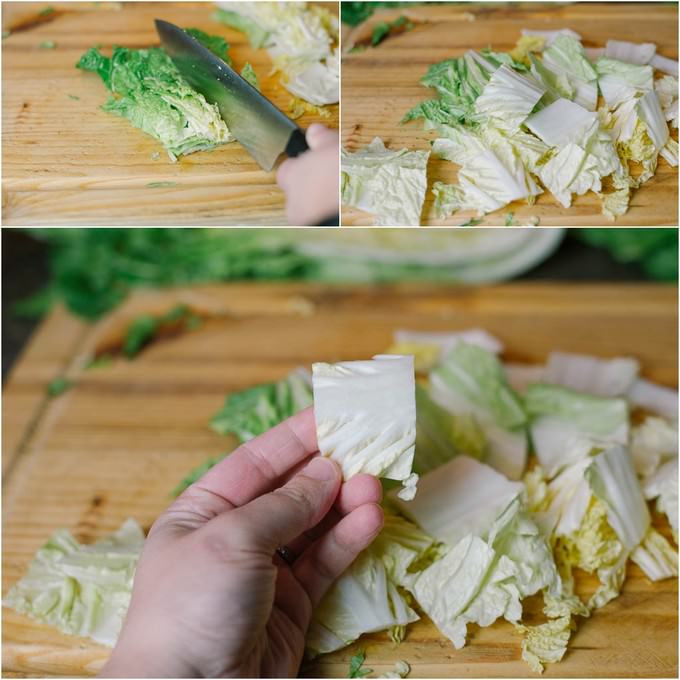
Have a huge bowl handy in order place the cut vegetables. Cut the Napa cabbage into four sections.
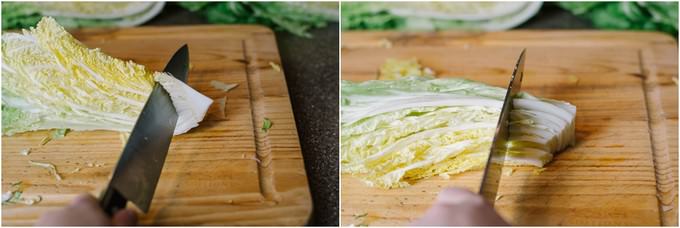
Cut out the small core from each section and cut the cabbage into 2 inch squares.
Larger leaves and larger pieces can be further cut down to create more or less a uniform look.
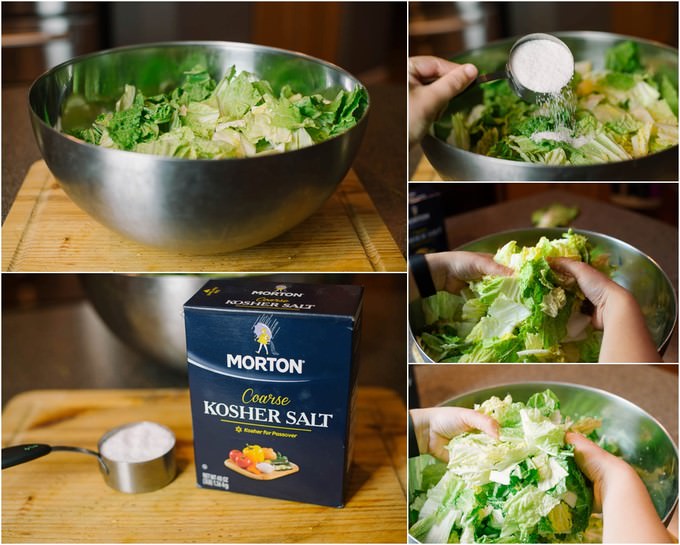
Place the cabbage pieces in a large bowl, sprinkle with 1/2 cup of kosher salt and give it a nice mix with your hands. If you are not using radishes in this recipe, let the cabbage sit undisturbed for about 1 hour. If you wish to add radishes proceed to next step.
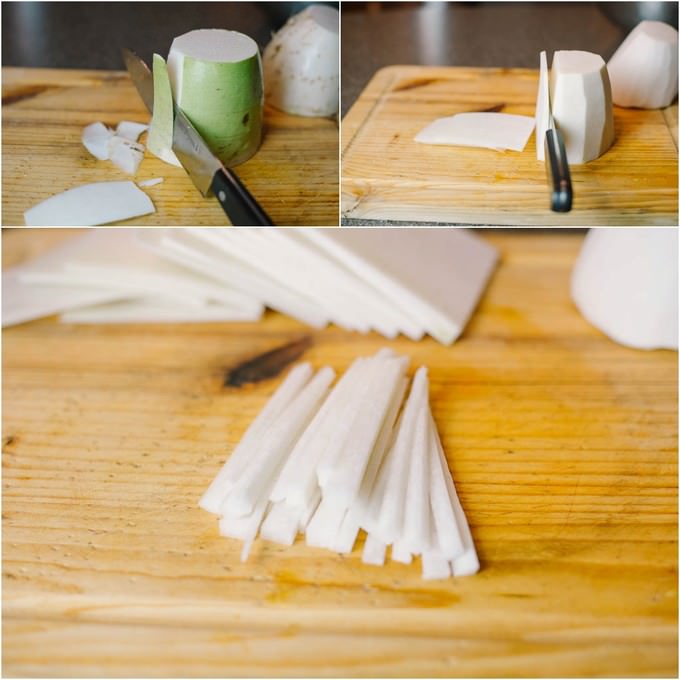
Carefully remove the skin of the Daikon or Korean radish, wash it and julienne it as thin or as thick you would like.
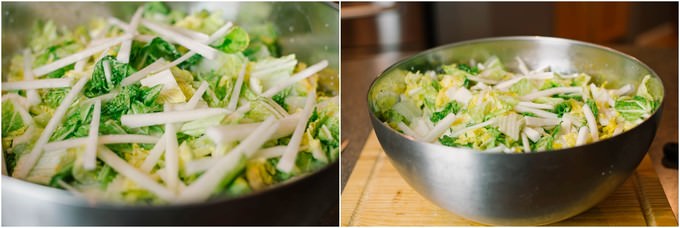
Incorporate the radishes into the cabbage and salt mixture and let them give some water, too.
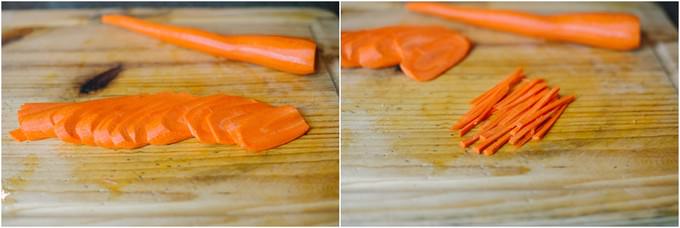
Slice the carrots and julienne. Put them aside.
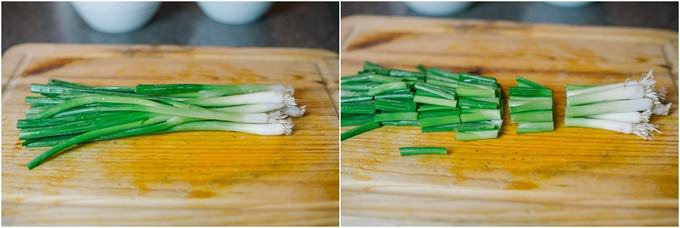
Slice the scallions about 2 inches in length, with white parts slices thinner. Place them in a bowl and put it aside.
The Sauce
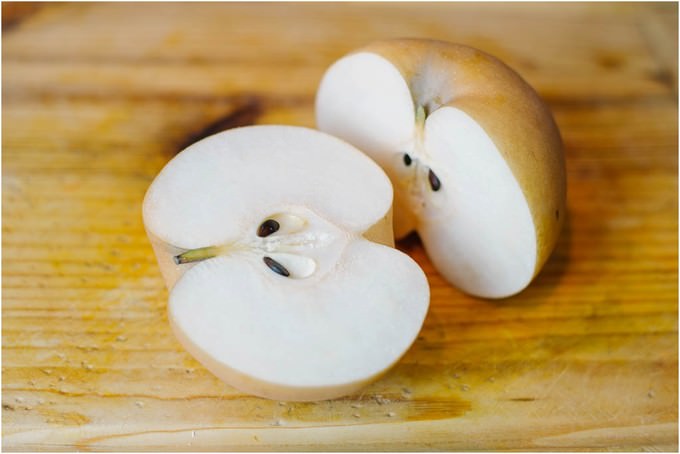
Core the Korean pear, remove the skin and cut it in large cubes. Remember, we are using half of it for this recipe.
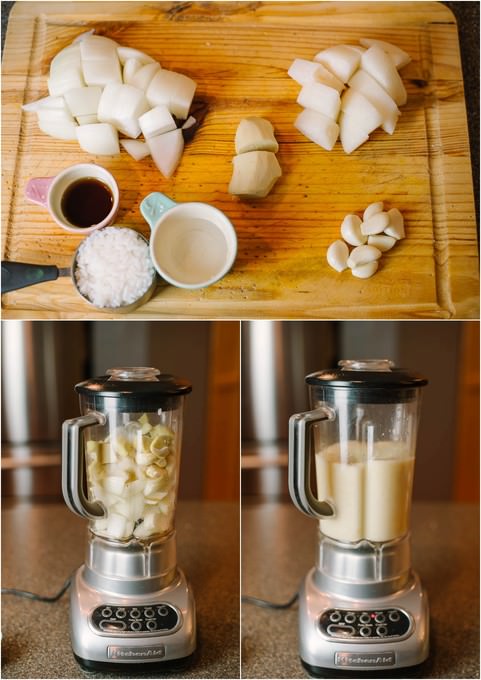
Chunk the onions, clean the ginger, peel the garlic, prepare the cooked rice, have water and fish sauce ready. Place all the ingredients in a blender and give it a nice twirl.
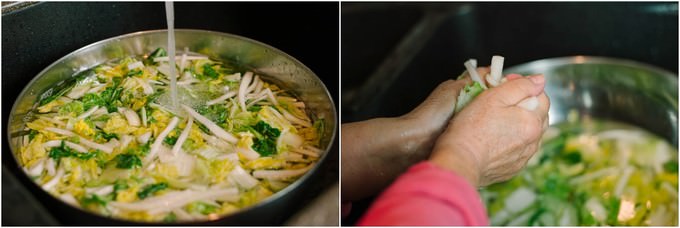
Once one hour is up it is time to wash out the excess salt from the cabbage. You can either squeeze out the cabbage by hand or use a salad spinner. Do this process twice with giving cabbage a good amount of soaking time under water.
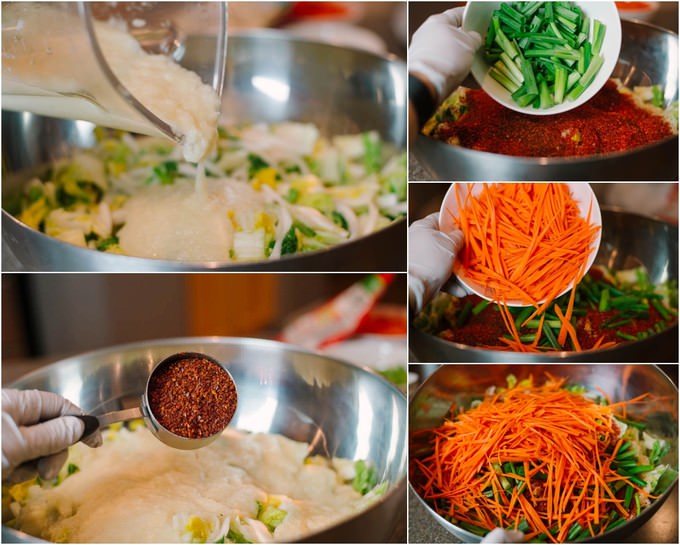
Dry the container from under the cabbage before you return the cabbage back to it, place washed cabbage back into the large container, add the ready sauce, add all of the julienned vegetables, add Gochugaru peppers and give everything a nice mix by hand. Err on the side of caution. If you are sensitive to smells and hot peppers, wear a glove while mixing the Kimchi.
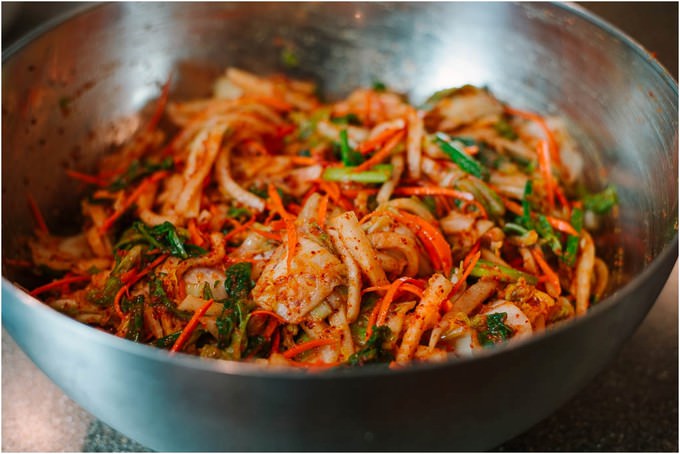
Once mixed your Kimchi is going to look like all colors of the rainbow. Doesn’t it look delicious?!
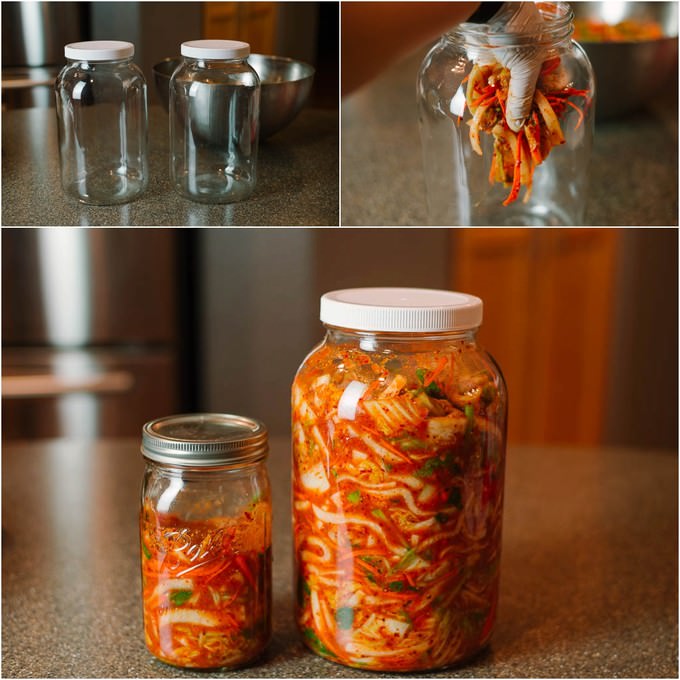
I use the above jars in order to ferment my Kimchi. I got these Jars of Amazon and I suggest you do the same. Because you may need to use them quite a bit in your kitchen. Otherwise, you are welcome to use other options for fermenting Kimchi. For example, if you have some Mason jars handy, you can definitely go for it. Place ready Kimchi into jars rather tightly and close the lid tight.
Storage
This step is very, very important. Do not neglect the storage and fermentation process of Kimchi. Store Kimchi in a dry, room temperature area, like a pantry for 3-5 days. Since we are keeping it in an airtight container, during the fermentation process bubbles will develop inside the jar. Every day or so open the lid of the jar and press out the air bubbles using a spoon. Otherwise, by the end of the 5th day, your kimchi might explode when you try to open it.
Your Kimchi will be ready for consumption within 3 days. However, I recommend you keep it fermenting for 5-7 days total. After this time is up, place Kimchi in the refrigerator and enjoy it with anything. I often use it as a side to my eggs in the morning. DELISH!
I hope you like my Kimchi recipe as it is suuuuuper easy to follow. However, if you have any questions regarding the process, storage or consumption, feel free to leave a comment any time!
Kimchi Recipe
Ingredients
- INGREDIENTS:
- Note: These ingredients will cover half of what I made. I like to make a bigger batch because I am not the only one eating it. Don’t let the volume in the photos confuse you. In case you want to make a bigger batch increase the ingredients accordingly.
- 1 large size Napa Cabbage
- 1 medium carrot julienned (or mandolined)
- 1 small diakon radish or Korean radish (optional, but we love the crunch)
- 1/2 cup Kosher salt
- 4 cloves of garlic
- 1 small onion
- 1/2 Korean Pear for sweetness and better fermentation, If need be sub it with another type of pear
- 2 inches of Ginger
- 2 TBSP fish sauce
- 1/2 cup Gochugaru in my case it is 1/4 mild, 1/4 medium
- 1/4 cooked White Rice (for fermentation)
- 1/4 cup Water
Instructions
- Have a huge bowl handy in order place the cut vegetables. Cut the Napa cabbage into four sections. Cut out the small core from each section and cut the cabbage into 2-inch squares. Larger leaves and larger pieces can be further cut down to create more or less a uniform look.
- Place the cabbage pieces in a large bowl, sprinkle with 1/2 cup of kosher salt and give it a nice mix with your hands. If you are not using radishes in this recipe, let the cabbage sit undisturbed for about 1 hour. If you wish to add radishes proceed to next step.
- Remove the skin of the Daikon or Korean radish, wash it and julienne it as thin or as thick you would like.
- Incorporate the radishes into the cabbage and salt mixture and let them give some water, too.
- Slice the carrots and julienne. Put them aside.
- Slice the scallions about 2 inches in length, with white parts slices thinner. Place them in a bowl and put it aside.
- Core the Korean pear, remove the skin and cut it in large cubes. Remember, we are using half of it for this recipe. Chunk the onions, clean the ginger, peel the garlic, prepare the cooked rice, have water and fish sauce ready. Place all the ingredients in a blender and give it a nice twirl.
- Once one hour is up it is time to wash out the excess salt from the cabbage. You can either squeeze out the cabbage by hand or use a salad spinner. Do this process twice with giving cabbage a good amount of soaking time under water.
- Dry the container from under the cabbage before you return the cabbage back to it, place washed cabbage back into the large container, add the ready sauce, add all of the julienned vegetables, add Gochugaru peppers and give everything a nice mix by hand. Err on the side of caution. If you are sensitive to smells and hot peppers, wear a glove while mixing the Kimchi.
- Place ready kimchi into large glass jars or mason jars. Try to pack it more or less tightly.
- Do not neglect the storage and fermentation process of Kimchi. Store Kimchi in a dry, room temperature area, like a pantry for 3-5 days. Since we are keeping it in an airtight container, during the fermentation process bubbles will develop inside the jar. Every day or so open the lid of the jar and press out the air bubbles using a spoon. Otherwise, by the end of the 5th day, your kimchi might explode when you try to open it.
- Your Kimchi will be ready for consumption within 3 days. However, I recommend you keep it fermenting for 5-7 days total. After this time is up, place Kimchi in the refrigerator and enjoy it with anything. I often use it as a side to my eggs in the morning. DELISH!


Hi Lola, thank you for sharing kimchi recipe with the beautiful pictures. Could you please share the link where we could buy the second type of Gochugaru (sweeter version). Thank you in advance for your time and help