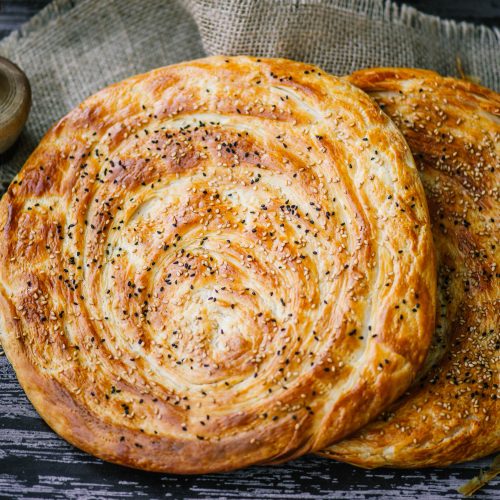
Layered Bread - Qatlama Patir
This layered bread is something you have to absolutely try. It is called Qatlama Patir in the Uzbek language, which means Layered flatbread. Its crispy and buttery texture will have you craving for more in no time.
Servings: 2 large breads
Ingredients
- 1 cup hot water
- 1 cup cold milk
- 1/2 Tbsp salt
- 4 cups loosely measured all-purpose flour
- 1 egg for egg wash (optional)
- 1 cup melted clarified butter (substitute with either butter or ghee)
- sesame seeds optional
Instructions
- In a medium bowl place hot water, cold milk, salt, and mix well. Add pre-measured flour and mix until all of the flour is moistened.
- Start kneading the dough until smooth. At most you may need an extra tablespoon of flour in order to scrape the sides of the bowl, clean the dough off of your hands and to finish of kneading. This process can also be done in a stand mixer.
- The final dough will not be very soft, but it will be pliable and easily manageable. Divide it into two and cover it with a plastic wrap (or lately my favorite – reusable silicone pouches). Let the dough rest for about 15 minutes.
- Once the dough has rested, take one dough out and place it on a flat surface where you will be rolling it. Sprinkle some flour on it. Using your knuckles press the dough into a thinner disk. This way you will create a big enough disk for you to be able to roll it into a rolling pin. Latch one section of the dough onto the rolling pin until the entire dough is wrapped around the pin somewhat tightly. Begin expanding the dough by performing front and back repetitive motion with your palms against the rolling pin for a few seconds. As the dough gets bigger, it will feel loose around the rolling pin. Unroll the dough and grab the next section to roll around the rolling pin. Repeat the same process until you have a large, thin disc. You can also use a smaller rolling pin to roll out the thicker sides of the dough in order to create some sort of uniformity.
- You may also stretch the dough out a bit with your hands if you wish to have thinner and much crispier layers. Totally your call. Once the desired size of the dough is reached, you may stop rolling the dough and proceed to the next step.
- With a tablespoon randomly pour half of the melted, clarified butter all over the dough. Using your hand spread out the butter evenly all over the dough. Let the clarified butter rest for 2 minutes before you roll it onto the pin. When the time is up, wrap the dough around the rolling tightly. Yes, the pin will get a little butter on it. No problem there.
- Using a sharp knife slice through the middle of the rolling pin. Now you have a big layered strip of dough. Remove the rolling pin and again cut through the middle of the dough creating two thinner strips of stacks of dough.
- Take one strip of stacked dough and gently place it over the other strip. Starting from the long edge of the strips start rolling them towards the other end, creating one chubby roll.
- Tuck the edge of the dough under itself, place the dough on the work surface and gently press on it to create yet another disk.
- Use a small rolling pin to roll out a large pancake measuring about 1/2 an inch thick. Don’t make it too thick and don’t make it too thin either.
- Using either a chakich (indentation maker in the Uzbek language) or a fork, stab the pancakes creating many indentations. If you would like to use an egg wash to give a nice shin to your bread, do so now. Simply mix 1 egg with 1 tbsp of water and whisk well. Spread the egg wash on the qatlama and decorate it with sesame seeds.
- Repeat the process for the second dough because one qatlama patir is just not enough!